Coredata第一课 认识coredata
问题
在iOS/Mac中我们有许多方式去持久化存储数据:NSUserDefault、NSFileHandle、基础框架中的write方法、归档等等。在实际应用中,我们经常需要将这些数据按一定格式转换为对象,并且进行一定的筛选等操作然后再使用,显得不是很方便。Apple给我们提供了Core Data框架,可以直接按对象的方式操作数据,让这些变得非常简单。
简介
CoreData中有这么几个常用的元素:
| 名称 | 作用 |
|---|---|
| NSManagedObjectModel | 对象模型,指定所用对象文件 |
| NSPersistentStoreCoordinator | 持久化存储协调器,设置对象的存储方式和数据存放位置 |
| NSManagedObjectContext | 对象管理上下文,负责数据的实际操作(重要) |
| NSEntityDescriptor | 实体描述符,描述一个实体,可以用来生成实体对应的对象 |
| NSManagedObject | 对象 |
| NSFetchRequest | 对象查询,相当于SQL的Select语句 |
使用步骤
先介绍使用最简单的方式,也就是在创建项目的时候,勾选“Core Data”选项。Xcode会自动替我们在“AppDelegate”中加入创建“NSManagedObjectModel”、“NSPersistentStoreCoordinate”和“NSManagedObjectContext”等对象,方便后面的使用。
 勾选截图
勾选截图
1 . 创建“NSManagedObjectModel”对象。
- (NSManagedObjectModel *)managedObjectModel {
    if (_managedObjectModel != nil) {
        return _managedObjectModel;
    }

    //CoreData模型文件的路径,注意编译好的模型文件名扩展名为"momd"
    NSURL *modelURL = [[NSBundle mainBundle] URLForResource:@"CoreData01" withExtension:@"momd"];
    _managedObjectModel = [[NSManagedObjectModel alloc] initWithContentsOfURL:modelURL];
    return _managedObjectModel;
}
2 . 创建“NSPersistentStoreCoordinator”对象。
- (NSPersistentStoreCoordinator *)persistentStoreCoordinator {
    if (_persistentStoreCoordinator != nil) {
        return _persistentStoreCoordinator;
    }

    //指定需要持久化的模型对象
    _persistentStoreCoordinator = [[NSPersistentStoreCoordinator alloc] initWithManagedObjectModel:[self managedObjectModel]];
    //持久化的存储文件
    NSURL *storeURL = [[self applicationDocumentsDirectory] URLByAppendingPathComponent:@"CoreData01.sqlite"];
    NSError *error = nil;
    //设置存储格式为SQLite
    if (![_persistentStoreCoordinator addPersistentStoreWithType:NSSQLiteStoreType configuration:nil URL:storeURL options:nil error:&error]) {

    }

    return _persistentStoreCoordinator;
}
3 . 创建上下文
- (NSManagedObjectContext *)managedObjectContext {
    // Returns the managed object context for the application (which is already bound to the persistent store coordinator for the application.)
    if (_managedObjectContext != nil) {
        return _managedObjectContext;
    }

    NSPersistentStoreCoordinator *coordinator = [self persistentStoreCoordinator];
    if (!coordinator) {
        return nil;
    }

    //创建管理上下文
    _managedObjectContext = [[NSManagedObjectContext alloc] init];
    //关联上下文与存储对象
    [_managedObjectContext setPersistentStoreCoordinator:coordinator];
    return _managedObjectContext;
}
4 . 设置模型文件,添加实体(Entity)
点击“CoreData01.xcdatamodelId”文件,然后添加一个实体“Book”,并增加几个属性。Core Data中的实体类似于数据库的表定义,规定了不同字段(属性)的名字和类型。
 img
img
5 . 创建模型对象的类, "Editor > Create NSManagedobject Subclass"。
 img
img
6 . 选择使用标量定义数值类型的属性(默认使用NSNumber类型定义int、float等类型的属性)。
 img
img
7 . Xcode自动创建于实体同名的类,并且继承自“NSManagedObject”。
8 . 创建对象并存储。
//获取AppDelegate中创建的上下文对象
AppDelegate *appDelegate = (AppDelegate *)[UIApplication sharedApplication].delegate;

NSManagedObjectContext *context = appDelegate.managedObjectContext;

//获取实体描述符
NSEntityDescription *entity = [NSEntityDescription entityForName:@"Book" inManagedObjectContext:context];
//创建对象
Book *book = [[NSManagedObject alloc] initWithEntity:entity insertIntoManagedObjectContext:context];
//设置对象的属性
book.title = @"红楼梦";
//保存数据
[context save:nil];
9 . 以后可以通过"NSFetchRequest"从文件中获取数据。
AppDelegate *appDelegate = (AppDelegate *)[UIApplication sharedApplication].delegate;
NSManagedObjectContext *context = appDelegate.managedObjectContext;

//创建请求对象,用于获取实体Book所对应的全部数据,可以通过给NSFetchRequest设置predicate和sortDescriptors对结果进行筛选和排序。
NSFetchRequest *fetchRequest = [NSFetchRequest fetchRequestWithEntityName:@"Book"];
NSArray *result = [context executeFetchRequest:fetchRequest error:nil];
NSLog(@"%@", result);
总结
Core Data的简单使用还是很方便的,我们只需要关注数据内容和处理逻辑,而不需要考虑过多的存储操作。但是它需要使用很多貌似没有直接关联的代码,使得大家感觉非常复杂。
Coredata第二课 实体间的关系
问题
如果多个实体之间有关联,比如Student拥有多本书Book,怎么像数据库一样的能够表示这种关系?
解决方法
Core Data提供了relationship来表示实体Entity之间的这种关系,包括一对一、一对多等。
1 .打开Core Data的模型文件,可以看到每个Entity都有一个Relationships可以设置。我们在Student里面添加一个books属性,并将它的类型(Type)设置为To Many(一对多)。
 img
img
2 .给Books添加一个owner属性,并将Inverse设为books。这样的话,只要将book对象添加到Student的books中,就会自动将owner属性指向该Student对象。通过改变实体的展示样式能够让我们看的更加清楚。
 img
img
3 .通过“Editor > NSManagedObject Subclass...”创建两个实体所对应的类。
Book:
@interface Book : NSManagedObject

@property (nonatomic, retain) NSString * title;
@property (nonatomic) float price;
@property (nonatomic, retain) Student *owner;

@end
Student:
@interface Student : NSManagedObject

@property (nonatomic, retain) NSString * name;
@property (nonatomic) int32_t age;
@property (nonatomic, retain) NSOrderedSet *books;
@end

@interface Student (CoreDataGeneratedAccessors)

//没有实现
- (void)insertObject:(Book *)value inBooksAtIndex:(NSUInteger)idx;
- (void)removeObjectFromBooksAtIndex:(NSUInteger)idx;
- (void)insertBooks:(NSArray *)value atIndexes:(NSIndexSet *)indexes;
- (void)removeBooksAtIndexes:(NSIndexSet *)indexes;
- (void)replaceObjectInBooksAtIndex:(NSUInteger)idx withObject:(Book *)value;
- (void)replaceBooksAtIndexes:(NSIndexSet *)indexes withBooks:(NSArray *)values;
- (void)addBooksObject:(Book *)value;
- (void)removeBooksObject:(Book *)value;
- (void)addBooks:(NSOrderedSet *)values;
- (void)removeBooks:(NSOrderedSet *)values;
@end
在Student是通过一个NSOrderdSet来表示一对多的关系的。这里之所以没有使用数组是因为需要保证数据的唯一性。我们还需要注意的是,在Student类中生成了许多管理Book的方法,但是这些方法都是没有实现的。比如我们需要添加一个增加Book的功能,就需要实现addBooksObject:。
- (void)addBooksObject:(Book *)value {
    NSMutableOrderedSet *books = [self.books mutableCopy];
    [books addObject:value];
    self.books = books;
}
4 .保存Student对象与Book对象。
NSManagedObjectContext *context = [AppDelegate appDelegate].managedObjectContext;

NSEntityDescription *entity = [NSEntityDescription entityForName:@"Student" inManagedObjectContext:context];
//创建Student对象
Student *stu = [[Student alloc] initWithEntity:entity insertIntoManagedObjectContext:context];

int r = arc4random_uniform(1000);
stu.name = [NSString stringWithFormat:@"Zhangsan: %d", r];

NSEntityDescription *bEntity = [NSEntityDescription entityForName:@"Book" inManagedObjectContext:context];
//创建Book对象
Book *book = [[Book alloc] initWithEntity:bEntity insertIntoManagedObjectContext:context];
book.title = @"红楼梦";
//添加Book对象
[stu addBooksObject:book];

//保存Student对象
[context insertObject:stu];
[context save:nil];
5 .查询Student对象,并通过打印查看是否保存了Book,并且能否通过book.owner得到它与Student对象的关系。
NSManagedObjectContext *context = [AppDelegate appDelegate].managedObjectContext;

NSFetchRequest *request = [NSFetchRequest fetchRequestWithEntityName:@"Student"];
NSArray *arr = [context executeFetchRequest:request error:nil];
for (Student *stu in arr) {
    NSLog(@"Name: %@", stu.name);
    for (Book *b in stu.books) {
        NSLog(@"Book: %@ -> %@", b.title, b.owner);
    }
}
6 .从结果可以看到,b.owner确实指向了一个Student对象。
2015-02-04 09:07:43.391 02-03-CoreDataRelationship[5169:235934] Name: Zhangsan: 333
2015-02-04 09:07:43.394 02-03-CoreDataRelationship[5169:235934] Book: 红楼梦 -> <Student: 0x7f9720d48bd0> (entity: Student; id: 0xd000000000040000 <x-coredata://C07E5BAC-C3F6-44B6-B21C-C3D3FBFA4ED1/Student/p1> ; data: {
    age = 0;
    books =     (
        "0xd000000000040002 <x-coredata://C07E5BAC-C3F6-44B6-B21C-C3D3FBFA4ED1/Book/p1>"
    );
    name = "Zhangsan: 333";
})
7 .总的来说Core Data自动替我们管理了实体(对象)之间的依赖关系,能够省去不少代码。
Coredata第三课 数据查询
问题
小明班上最近月考了,老师大明想要给一部分优秀的同学进行奖励,而另外一部分要进行查漏补缺。大明决定将总分排名前10的,各科成绩排名前10的以及排名最后10名的按从高到低的顺序找出来。以前大明都是在家用笔一个个划出来。不过最近大明决定装逼一把,给自己的“肾6+”开发了一款应用。只要各科老师将成绩提交给他,就可以直接看到这些学生的成绩了,并且各种曲线、柱状图、饼图。每个学生的情况就好比没穿衣服一样”透明“。现在的问题是,大明并不想自己去实现各种筛选和排序算法。
解决方法
很快大明就想到了戴维营教育的博客上Core Data除了简单的存取功能外,还具备各种取数据的方法。
一、数据获取
Core Data中获取数据必须通过NSFetchRequest进行。我们有两种方式获取NSFetchRequest对象。
- 通过实体名称创建
NSFetchRequest对象。
这种方式其实就是我们在前面两篇文章中用来获取数据的技巧。
NSFetchRequest *fetchRequest = [NSFetchRequest fetchRequestWithEntityName:@"Person"];
//或者
NSFetchRequest *fetchRequest = [[NSFetchRequest alloc] init];

NSEntityDescription *entity = [NSEntityDescription entityForName:@"Person" inManagedObjectContext:context];
fetchRequest.entity = entity;
- 通过模型文件中创建的请求模版创建。
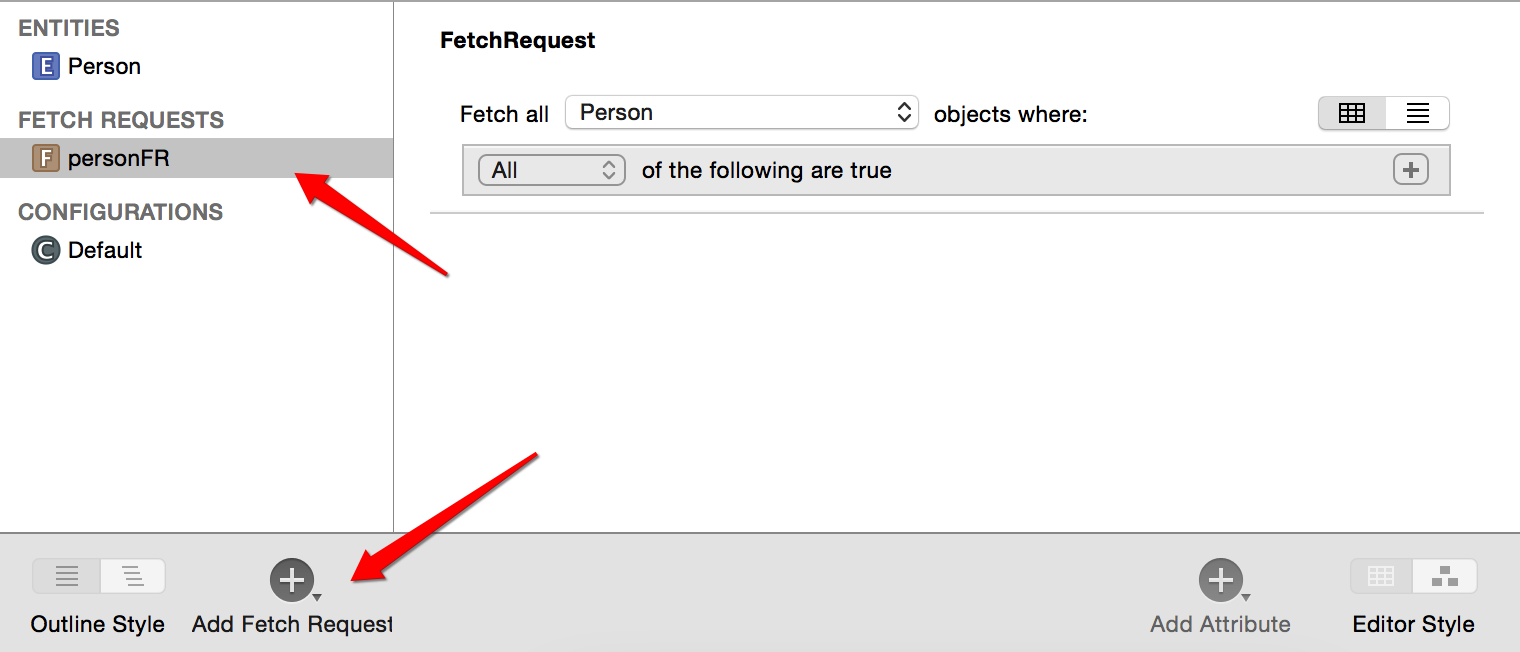 img
img
//使用managedModel获取fetchRequest模版
NSFetchRequest *fetchRequest = [appDelegate.managedObjectModel fetchRequestTemplateForName:@"personFR"];
- 我们可以指定fetchRequest的结果类型来获取不同数据,如存储的对象、结果数目等。
//    NSFetchRequest *fetchRequest = [appDelegate.managedObjectModel fetchRequestTemplateForName:@"personFR"];
    //如果需要改变结果的类型,不能使用从模版生成的request对象
    NSFetchRequest *fetchRequest = [NSFetchRequest fetchRequestWithEntityName:@"Person"];
    //获取结果总数
    fetchRequest.resultType = NSCountResultType;
不过我们也不只一种获取结果数目的方式。在Context里面提供了一系列的操作request的方法,其中就包括了获取结果数目的功能。
NSFetchRequest *fetchRequest = [NSFetchRequest fetchRequestWithEntityName:@"Person"];

//获取结果数目
NSUInteger count = [context countForFetchRequest:fetchRequest error:nil];
二、筛选结果集
大明已经可以得到所有学生的成绩信息了,接下来要做的就是对它们进行排序和筛选。
- 给学生成绩进行排序
NSFetchRequest *fetchRequest = [NSFetchRequest fetchRequestWithEntityName:@"Person"];

//排序描述符,按score降序排列
NSSortDescriptor *sort01 = [NSSortDescriptor sortDescriptorWithKey:@"score" ascending:NO];
//可以同时按多个属性进行排序
fetchRequest.sortDescriptors = @[sort01];
NSArray *result = [context executeFetchRequest:fetchRequest error:nil];

if (result) {
    _people = [NSMutableArray arrayWithArray:result];
    for (NSObject *obj in _people) {
        NSLog(@"%@", [obj valueForKey:@"score"]);
    }
}
结果:
2015-02-04 10:54:16.599 02-02-CoreData01[5832:276345] 99
2015-02-04 10:54:16.600 02-02-CoreData01[5832:276345] 60
2015-02-04 10:54:16.600 02-02-CoreData01[5832:276345] 56
2015-02-04 10:54:16.600 02-02-CoreData01[5832:276345] 45
- 筛选出成绩排名前十的学生
NSFetchRequest *fetchRequest = [NSFetchRequest fetchRequestWithEntityName:@"Person"];

NSSortDescriptor *sort01 = [NSSortDescriptor sortDescriptorWithKey:@"score" ascending:NO];
fetchRequest.sortDescriptors = @[sort01];
//限制只取前十,其实这是有问题的,万一有重复的分数,后面的就取不到了。
fetchRequest.fetchLimit = 10;
NSArray *result = [context executeFetchRequest:fetchRequest error:nil];
- 使用NSPredicate筛选成绩高于90分的学生
NSPredicate *predicate = [NSPredicate predicateWithFormat:@"score >= 90"];
fetchRequest.predicate = predicate;
进阶
上面的这些数据获取方式都是同步的方式,如果数据量比较大的话,会显著的影响到程序的性能和用户体验。Core Data中也提供了异步数据获取功能。
AppDelegate *appDelegate = (AppDelegate *)[UIApplication sharedApplication].delegate;
NSManagedObjectContext *context = appDelegate.managedObjectContext;

NSFetchRequest *fetchRequest = [NSFetchRequest fetchRequestWithEntityName:@"Person"];

NSSortDescriptor *sort01 = [NSSortDescriptor sortDescriptorWithKey:@"score" ascending:NO];
fetchRequest.sortDescriptors = @[sort01];
fetchRequest.fetchLimit = 2;

//异步请求
NSAsynchronousFetchRequest *asyncRequst = [[NSAsynchronousFetchRequest alloc] initWithFetchRequest:fetchRequest completionBlock:^(NSAsynchronousFetchResult *result) {
    for (NSObject *obj in result.finalResult) {
        NSLog(@"%@", [obj valueForKey:@"score"]);
    }
}];

//执行异步请求
[context executeRequest:asyncRequst error:nil];
注意: 在使用异步请求的时候,需要设置NSManagedContext对象的并发类型,否则会出错。
2015-02-04 12:12:50.709 02-02-CoreData01[6083:300576] *** Terminating app due to uncaught exception 'NSInvalidArgumentException', reason: 'NSConfinementConcurrencyType context <NSManagedObjectContext: 0x7fb27b72c5f0> cannot support asynchronous fetch request <NSAsynchronousFetchRequest: 0x7fb27b71d750> with fetch request <NSFetchRequest: 0x7fb27b7247a0> (entity: Person; predicate: ((null)); sortDescriptors: ((
    "(score, descending, compare:)"
)); limit: 2; type: NSManagedObjectResultType; ).'
解决办法是在创建Context对象的时候,设置它的并发类型。
NSPersistentStoreCoordinator *coordinator = [self persistentStoreCoordinator];
if (!coordinator) {
    return nil;
}

//创建Context对象,并设置并发类型
_managedObjectContext = [[NSManagedObjectContext alloc] initWithConcurrencyType:NSMainQueueConcurrencyType];
[_managedObjectContext setPersistentStoreCoordinator:coordinator];


网友评论