字节流
- InputStream 输入字节流
- OutputStream 输出字节流
输入字节流----InputStream
InputStream 是所有的输入字节流的父类,它是一个抽象类。同样的来看它的子类。
FileInputStream 继承自InputStream
构造方法:
 //传一个文件路径(字符串)
 public FileInputStream(String var1) throws FileNotFoundException {
        this(var1 != null?new File(var1):null);
    }//如:FileInputStream in=new FileInputStream(String path);

  //传一个文件
 public FileInputStream(File var1) throws FileNotFoundException {
    ....
    }//如:FileInputStream in=new FileInputStream(new File(String path));

  //不常用
 public FileInputStream(FileDescriptor var1) {
     ...
    }
主要方法
-
int read();//返回值int,若返回值为-1,则代表已经读完,是不是和字符流很像,但每次读一个字节,并打印,如果存在中文,可能会乱码
-
int read(byte[] bytes);//每次读bytes字节
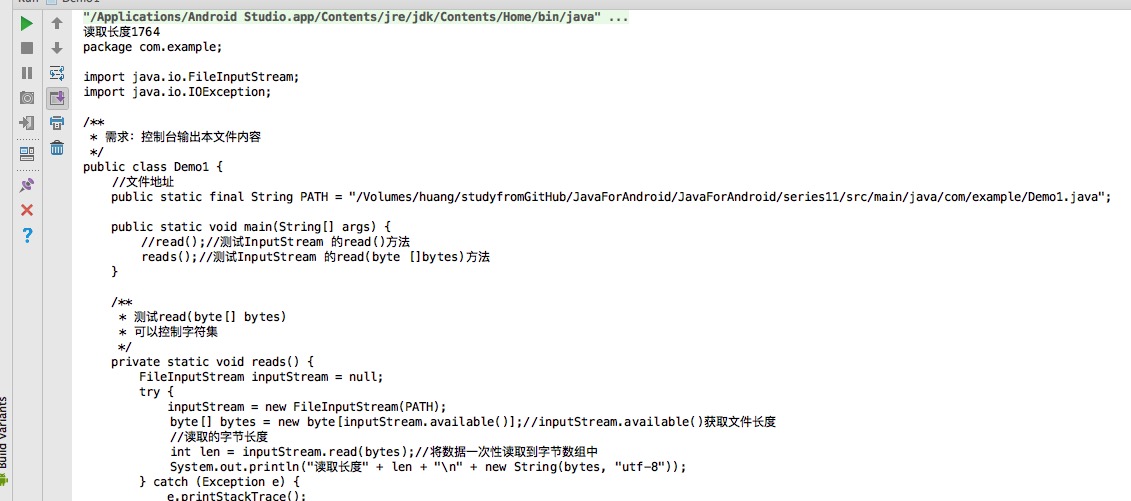
代码演示:
    /**
     * 需求:控制台输出本文件内容
     */
    public class Demo {
        //文件地址
        public static final String PATH = "/Volumes/huang/studyfromGitHub/JavaForAndroid/JavaForAndroid/series11/src/main/java/com/example/Demo1.java";
        //文件名
        public static final String NAME = "copyTest1.java";

        public static void main(String[] args) {
            //  read();//测试InputStream 的read()方法
            reads();
        }

        /**
         * 测试read(byte[] bytes)
         * 可以控制字符集
         */
        private static void reads() {
            FileInputStream inputStream = null;
            try {
                inputStream = new FileInputStream(PATH);
                byte[] bytes = new byte[inputStream.available()];//inputStream.available()获取文件长度
                //读取的字节长度
                int len = inputStream.read(bytes);//将数据一次性读取到字节数组中
                System.out.println("读取长度" + len + "\n" + new String(bytes, "utf-8"));
            } catch (Exception e) {
                e.printStackTrace();
            }

        }

        /**
         * 测试read()
         * 每次读一个字节,并打印,如果存在中文,可能会乱码
         */
        private static void read() {
            FileInputStream inputStream = null;
            try {
                inputStream = new FileInputStream(PATH);
                int len = 0;
                while ((len = inputStream.read()) != -1) {
                    System.out.print((char) len);
                }
            } catch (Exception e) {
                e.printStackTrace();
            } finally {
                try {
                    inputStream.close();
                } catch (IOException e) {
                    e.printStackTrace();
                }
            }
        }
    }
结果----read(),出现了乱码.

结果----read(byte[]bytes),设置了字符集,没出现乱码.

有没有觉得都差不多.
输出字节流----OutputStream
OutputStream 是所有的输入字节流的父类,它是一个抽象类。同样的来看它的子类。
FileOutStream 继承自OutputStream
构造方法:
    //是不是和FileWriter很像,第一个参数目的是创建一个向指定 File 对象表示的文件中写入数据的文件输出流。如果第二个参数为 true,则将字节写入文件末尾处,而不是写入文件开始处。
    public FileOutputStream(String var1) throws FileNotFoundException {
            ....
        }

    public FileOutputStream(String var1, boolean var2) throws FileNotFoundException {
            .....
        }

    public FileOutputStream(File var1) throws FileNotFoundException {
            this(var1, false);
        }

    public FileOutputStream(File var1, boolean var2) throws FileNotFoundException {
          ......
        }

    public FileOutputStream(FileDescriptor var1) {
          .....
        }
主要方法
- void write(byte[]bytes);//写字节数组
写纯文本文件-----案例
-
Config类代码:(通用案例1,2,3)
public class Config { public static final String PATH="/Volumes/huang/studyfromGitHub/JavaForAndroid/JavaForAndroid/series11/src/main/java/files"; } -
主要代码
private static final String fileName = "testOutput.java"; /** * */ private static void write() { FileOutputStream outputStream = null; try { outputStream = new FileOutputStream(Config.PATH + fileName); outputStream.write("你好啊,美女".getBytes()); } catch (Exception e) { e.printStackTrace(); }finally { try { outputStream.close(); } catch (IOException e) { e.printStackTrace(); } } } -
结果

拷贝纯文本文件-----案例(读,写)
-
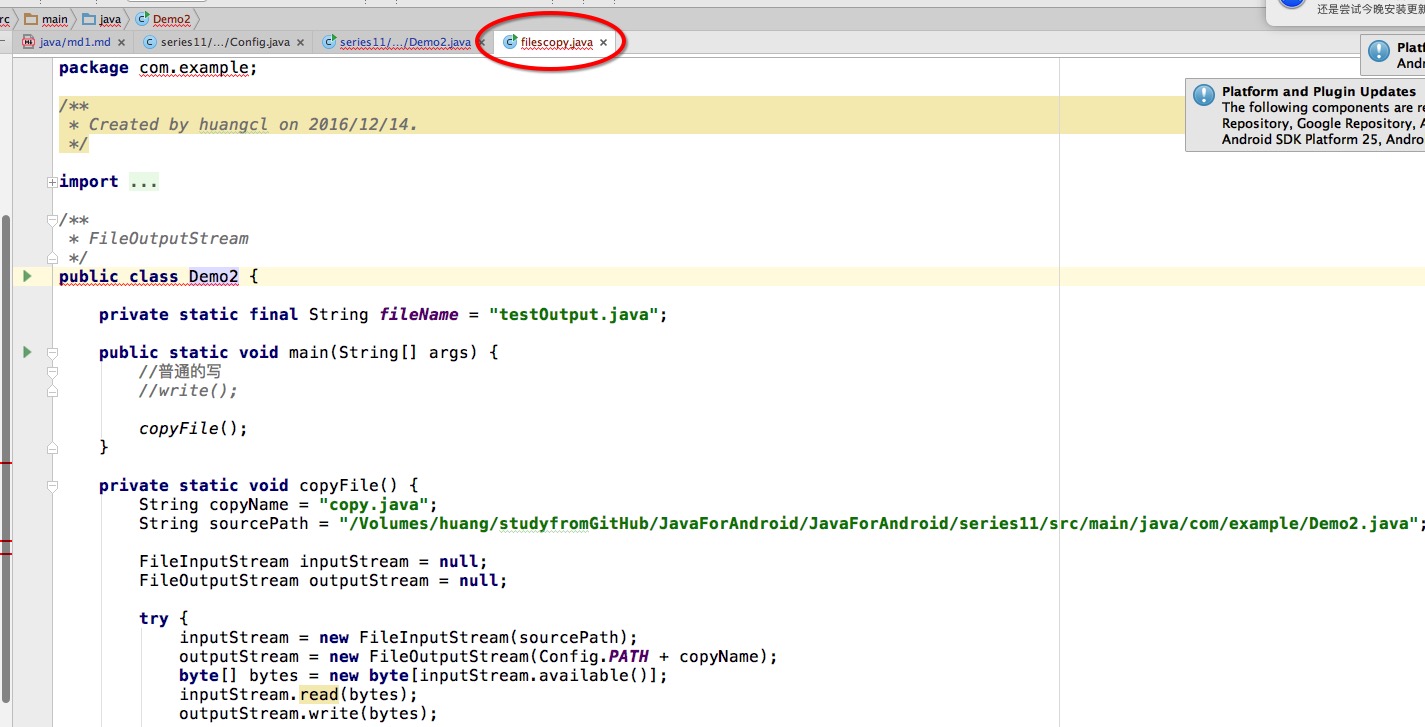
代码
/** * 拷贝本类文件 */ private static void copyFile() { String copyName = "copy.java"; String sourcePath = "/Volumes/huang/studyfromGitHub/JavaForAndroid/JavaForAndroid/series11/src/main/java/com/example/Demo2.java"; FileInputStream inputStream = null; FileOutputStream outputStream = null; try { inputStream = new FileInputStream(sourcePath); outputStream = new FileOutputStream(Config.PATH + copyName); byte[] bytes = new byte[inputStream.available()]; inputStream.read(bytes); outputStream.write(bytes); } catch (Exception e) { e.printStackTrace(); } finally { try { inputStream.close(); outputStream.close(); } catch (IOException e) { e.printStackTrace(); } } } -
结果

拷贝图片-----案例(读,写)
-
代码
/** * 拷贝图片step1.png */ private static void copyPicture() { String picSource = "/Volumes/huang/studyfromGitHub/JavaForAndroid/JavaForAndroid/series11/src/main/java/images/step1.png"; String copyName = "copyPic.png"; FileInputStream inputStream = null; FileOutputStream outputStream = null; try { inputStream = new FileInputStream(picSource); outputStream = new FileOutputStream(Config.PATH + copyName); //定义缓冲区--字节数组 byte[] bytes=new byte[1024]; //每次最多读取1K节字 int len=-1; //每次读取的字节长度 while((len=inputStream.read(bytes))!=-1){ //-1代表的是文件结尾标识 outputStream.write(bytes, 0, len); } } catch (Exception e) { e.printStackTrace(); } finally { try { inputStream.close(); outputStream.close(); } catch (IOException e) { e.printStackTrace(); } } } -
结果

同样的,字节流也有带缓冲的,基本都是一样的,当读写纯文本的时候优先考虑字符流,读写非纯文本的时候用字节流。下面我们继续看带缓冲的字节流,基本一样。
带缓冲的字节流读写案例(BufferedInputStream 读,BufferedOutputStream 写)没有关闭的流你们自行关闭。
-
Config 类
public class Config { public static final String PATH="/Volumes/huang/studyfromGitHub/JavaForAndroid/JavaForAndroid/series11/src/main/java/files"; } -
测试类
  /**
   * 带缓冲的字节流
   * <p>
   * 需求:使用带缓冲的字节流拷贝文件
   */
  public class Demo3 {

      //纯文本源文件路径
      private static final String txtPath = "/Volumes/huang/studyfromGitHub/JavaForAndroid/JavaForAndroid/series11/src/main/java/com/example/Demo2.java";
      //拷贝后的纯文本文件名
      private static final String txtName = "copy.java";

      //图片源文件路径
      private static String picPath = "/Volumes/huang/studyfromGitHub/JavaForAndroid/JavaForAndroid/series11/src/main/java/images/step1.png";
      //拷贝后的图片名
      private static String picName = "copyPic.png";

      public static void main(String[] args) {
          //copy(txtPath, txtName);
          copy(picPath, picName);
      }

      /**
       * 拷贝文件
       * Config.PATH 是上面提到的
       *
       * @param sourcePath 源路径
       * @param targetName 文件名
       */
      private static void copy(String sourcePath, String targetName) {
          //申明变量
          FileInputStream inputStream = null;
          BufferedInputStream bufferedInputStream = null;

          FileOutputStream outputStream = null;
          BufferedOutputStream bufferedOutputStream = null;

          //实例化变量
          try {
              inputStream = new FileInputStream(sourcePath);
              bufferedInputStream = new BufferedInputStream(inputStream);

              outputStream = new FileOutputStream(Config.PATH + targetName);
              bufferedOutputStream = new BufferedOutputStream(outputStream);
              byte[] bytes = new byte[2048];//大小可以自己指定,但不要非常非常大。
              int len = 0;
              while ((len = bufferedInputStream.read(bytes)) != -1) {
                  bufferedOutputStream.write(bytes, 0, len);//向缓冲区中写入指定长度的数据
                  bufferedOutputStream.flush();//将数据从内存中写入到文件中
              }
          } catch (Exception e) {
              e.printStackTrace();
          } finally {
              try {
                  bufferedInputStream.close();//关闭流(处理流),其中的包装流会自动关闭
                  bufferedOutputStream.close();
              } catch (IOException e) {
                  e.printStackTrace();
              }
          }

      }
  }
结果
都是一样的。
InputStram 绑定System.in 案例
    public class Demo4 {

        /**
         * 打印从键盘输入的字母,直到输入exit结束程序
         * @param args
         */
        public static void main(String[] args) {
            InputStream inputStream = System.in;
            int num = -1;
            StringBuilder sb = new StringBuilder();
            while (true) {
                try {
                    num = inputStream.read();
                    //判断字符是否换行
                    if (num == '\n') {
                        String line = sb.toString().trim();//去除两边的空格

                        if (line.equalsIgnoreCase("over")) {
                            break;
                        }
                        System.out.println(line); //打印输入的一行数据(字母是大写)
                        //重置字符串变量的内容
                        sb.delete(0, sb.length());
                    }
                    sb.append((char) num);
                } catch (IOException e) {
                    e.printStackTrace();
                }

            }
        }
    }
结果

可是兄弟们,你们看到打印字符串乱码了吗,字节流不能操作Unicode字符,由于Java采用16位的Unicode字符,
所以要使用基于字符的输入输出操作。所以有了字符流,以提供直接的字符输入输出的支持。而字节流怎么转成字符流呢,Java为我们提供了两个类,InputStreamReader,
OutputStreamWriter。作为字节流和字符流的桥接,并可以设置字符编码.
-
InputStreamReader 构造方法
//来自源码 // 接收一个字节流实例 public InputStreamReader(InputStream var1) { super(var1); try { this.sd = StreamDecoder.forInputStreamReader(var1, this, (String)null); } catch (UnsupportedEncodingException var3) { throw new Error(var3); } } //接受一个字节流实例和一个String 类型的参数,再深入看代码可猜测var2和字符集(charset)有关系 public InputStreamReader(InputStream var1, String var2) throws UnsupportedEncodingException { super(var1); if(var2 == null) { throw new NullPointerException("charsetName"); } else { this.sd = StreamDecoder.forInputStreamReader(var1, this, var2); } } //同 public InputStreamReader(InputStream var1, Charset var2) { super(var1); if(var2 == null) { throw new NullPointerException("charset"); } else { this.sd = StreamDecoder.forInputStreamReader(var1, this, var2); } } //基本一样 public InputStreamReader(InputStream var1, CharsetDecoder var2) { super(var1); if(var2 == null) { throw new NullPointerException("charset decoder"); } else { this.sd = StreamDecoder.forInputStreamReader(var1, this, var2); } } -
OutputStreamWriter 构造方法(实参var2作用同InputStreamReader)
  public OutputStreamWriter(OutputStream var1, String var2) throws UnsupportedEncodingException {
          super(var1);
          if(var2 == null) {
              throw new NullPointerException("charsetName");
          } else {
              this.se = StreamEncoder.forOutputStreamWriter(var1, this, var2);
          }
      }

      public OutputStreamWriter(OutputStream var1) {
          super(var1);

          try {
              this.se = StreamEncoder.forOutputStreamWriter(var1, this, (String)null);
          } catch (UnsupportedEncodingException var3) {
              throw new Error(var3);
          }
      }

      public OutputStreamWriter(OutputStream var1, Charset var2) {
          super(var1);
          if(var2 == null) {
              throw new NullPointerException("charset");
          } else {
              this.se = StreamEncoder.forOutputStreamWriter(var1, this, var2);
          }
      }

      public OutputStreamWriter(OutputStream var1, CharsetEncoder var2) {
          super(var1);
          if(var2 == null) {
              throw new NullPointerException("charset encoder");
          } else {
              this.se = StreamEncoder.forOutputStreamWriter(var1, this, var2);
          }
      }
案例优化,接收打印中文字符
    /**
     * 字节流,字符流转换
     */
    public class Demo5 {
        public static void main(String[] args) {
            //输入流绑定键盘输入
            InputStream inputStream = System.in;
            //字符输入流声明
            InputStreamReader inputStreamReader = null;
            try {
                //实例化带有编码格式的字符流
                inputStreamReader = new InputStreamReader(inputStream, "utf-8");
                //包装
                BufferedReader bufferedReader = new BufferedReader(inputStreamReader);
                String line = null;
                while (true) {
                    //判断读取
                    line = new String(bufferedReader.readLine());
                    if (line.trim().equalsIgnoreCase("exit")) {
                        break;
                    }
                    //打印输出
                    System.out.println(line);

                }
            } catch (Exception e) {
                e.printStackTrace();
            }
        }
    }
结果

持续深入
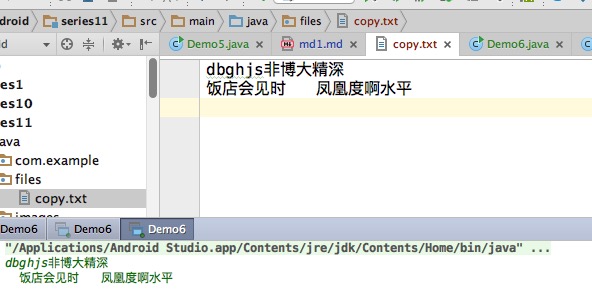
    /**
     * 需求:接收键盘输入的内容,并打印到文件里去
     */
    public class Demo6 {

        public static void main(String[] args) {
    //1. 通过转换流,获取到读取键盘的字符输入流
            BufferedReader reader = new BufferedReader(new InputStreamReader(System.in));
            String fileName = "copy.txt";//文件名
            //涉及到了System.in,System.out,System.setOut(...),PrintWriter

            //设置控制输出的数据位置--保存到文件中
            try {
                //File.separator分隔符
                System.setOut(new PrintStream(Config.PATH + File.separator + fileName));
            } catch (FileNotFoundException e) {
                e.printStackTrace();
            }

            //2. 通过转换流,将控制台的字节流转换成缓冲的字符流
            BufferedWriter writer = new BufferedWriter(new OutputStreamWriter(System.out));

            //3. 开始读取数据
            String line = null;
            while (true) {
                try {
                    line = reader.readLine().trim();
                    if (line.equalsIgnoreCase("exit")) {
                        break;
                    }
                    writer.write(line);
                    writer.newLine();
                    writer.flush();
                } catch (Exception e) {
                    e.printStackTrace();
                }

            }

        }

    }
结果


网友评论