前言:
uni-app的框架结构本质上和vue有很多相似的地方,只不过为了实现多端跨平台做了部分转换处理.所以只要你会写基本的css 和vue 基本没什么问题。
这次介绍的是uni-app 的《插件市场》 作为一个后端程序员UI是最为头疼的问题,但有了uni-app的插件市场很多UI库都能从里面找到
当然这些UI库都是一些大神的开源作品,这里我选取了ColorUII这个UI库。[ColorUI-UniApp]https://github.com/weilanwl/ColorUI
博客园里uni-app实战同僚的文章讲解的非常详细,这里转载为他点赞👍
目录
博客园地址
第一章搭建uni-app 记账小程序
第二章《uni-app记账小程序导航登录注册篇》
正文
<font size=4 face="微软雅黑" >微信的调试预览和真机调试功能是需要开发者ID的,申请步骤很简单就不再赘述了</font>
微信开发工具
避免重复造轮子,直接前往插件市场找
使用引导页面资源
APP-引导页 新增定位及天气👍
1.做app的引导界面
实现原理:
(1)通过app.vue的启动函数 onLaunch 进入函数以后,使用api uni.setTabBarBadge()来控制你要率先显示的界面,也就是显示你要的引导页
(2)再通过swiper组件是实现滑动的效果
(3)本地保存是否显示引导界面的参数,用来判断首次安装或是首次加载(引导界面展示的图片可以用网络路径 https ,而控制是否显示的参数也是后台api接口提供,这样,比如你更新了或是有新的广告图片可以在服务端控制)
案例都有了实现起来就很简单了
第一步
新建 guide.vue pages文件夹->index文件夹->右键 (新建-vue文件) 页面做两件事
<template>
    <view class="content">
        <swiper class="swiper" :autoplay="autoplay" :duration="duration">
            <swiper-item>
                <view class="swiper-item">
                    <view class="swiper-item-img">
                        <image src="../../static/guide/title_01.png" mode="aspectFit"></image>
                    </view>
                    <view class="swiper-item-img">
                        <image src="../../static/guide/icon_01.png" mode="aspectFit"></image>
                    </view>
                </view>
                <view class="jump-over" @tap="launchFlag()">{{jumpover}}</view>
            </swiper-item>
        </swiper>
        <view class="uniapp-img">
            <image src="../../static/guide/uniapp4@2x.png" mode="aspectFit"></image>
        </view>
    </view>
</template>

<script>
    export default {

        data() {
            return {
                jumpover: '跳过',
                autoplay: false, //是否自动切换- 这里swiper 就相当于是轮播图
                duration: 500, //滑动时长
                loagtime: setTimeout(() => {     ///过了5秒没有点击就自动关闭
                    uni.setStorage({
                        key: 'launchFlag',
                        data: true,
                    });
                    uni.reLaunch({
                        url: '/pages/index/index'
                    });
                }, 3000),
            }
        },
        onLoad() {
             this.loagtime;
        },
        methods: {
            launchFlag: function() {
                clearTimeout(this.loagtime);
                /**
                 * 向本地存储中设置launchFlag的值,即启动标识;
                 */
                try {
                    console.log('我来设置启动的值')
                    uni.setStorage({
                        key: 'launchFlag',
                        data: true,
                    });
                    uni.reLaunch({
                        url: '/pages/index/index'
                    });
                } catch (e) {
                    //TODO handle the exception
                    console.log('报错了')
                }


            }
        }
    }
</script>
<style>
    page,
    .content {
        width: 100%;
        height: 100%;
        background-size: 100% auto;
        padding: 0;
    }

    .swiper {
        width: 100%;
        height: 80%;
        background: #FFFFFF;
    }

    .swiper-item {
        width: 100%;
        height: 100%;
        text-align: center;
        position: relative;
        display: flex;
        /* justify-content: center; */
        align-items: flex-end;
        flex-direction: column-reverse
    }

    .swiper-item-img {
        width: 100%;
        height: auto;
        margin: 0 auto;
    }

    .swiper-item-img image {
        width: 80%;
    }

    .uniapp-img {
        height: 20%;
        background: #FFFFFF;
        display: flex;
        justify-content: center;
        align-items: center;
        overflow: hidden;
    }

    .uniapp-img image {
        width: 40%;
    }

    .jump-over,
    .experience {
        position: absolute;
        height: 60upx;
        line-height: 60upx;
        padding: 0 40upx;
        border-radius: 30upx;
        font-size: 32upx;
        color: #454343;
        border: 1px solid #454343;
        z-index: 999;
    }

    .jump-over {
        right: 45upx;
        top: 125upx;
    }

    .experience {
        right: 50%;
        margin-right: -105upx;
        bottom: 0;
    }
</style>
第二步
新建 index.vue pages文件夹->index文件夹->右键 (新建-vue文件) 页面做一件事 (判断 我们是不是第一次安装或是第一次加载)
<template>
<view class="content">
<image class="logo" src="/static/logo.png"></image>
<view class="out-btn" @tap="outBtn()">清除launchFlag值</view>
<view>
<text class="title">{{title}}</text>
</view>
</view>
</template>
<script>
<template>
<view class="content">
<image class="logo" src="/static/logo.png"></image>
<view class="out-btn" @tap="outBtn()">清除launchFlag值</view>
<view>
<text class="title">{{title}}</text>
</view>
</view>
</template>
<script>
export default {
data() {
return {
title: 'Hello'
}
},
onLoad() {
console.log('再次加载')
this.loadExecution()
},
methods: {
outBtn: function() {
uni.showModal({
title: '清除launchFlag值',
content: '确定要清除launchFlag值,进行重启测试?',
success: function(res) {
if (res.confirm) {
console.log('用户点击确定');
// 清除缓存
uni.clearStorage();
// 两秒后重启
// #ifdef APP-PLUS
uni.showToast({
icon: 'none',
duration: 3000,
title: '清除成功2秒后重启'
});
setTimeout(function() {
uni.hideToast();
plus.runtime.restart();
}, 2000);
// #endif
// 两秒后跳转
// #ifdef H5 || MP-WEIXIN
uni.showToast({
icon: 'none',
duration: 3000,
title: '清除成功2秒后刷新'
});
setTimeout(function() {
uni.reLaunch({
url: '/pages/index/guide'
});
}, 2000);
console.log('跳转到首页')
// #endif
} else if (res.cancel) {
console.log('用户点击取消');
}
}
});
},
loadExecution: function() {
/**
* 获取本地存储中launchFlag的值
* 若存在,说明不是首次启动,直接进入首页;
* 若不存在,说明是首次启动,进入引导页;
*/
try {
const value = uni.getStorageSync('launchFlag');
if (!value||value=='') {
uni.reLaunch({ //// 跳转方式不同
url: '/pages/index/guide'
});
}
} catch (e) {
// error
uni.setStorage({
key: 'launchFlag',
data: true,
success: function() {
console.log('error时存储launchFlag');
}
});
uni.reLaunch({
url: '/pages/index/index'
});
}
}
}
}
</script>
<style>
.content {
text-align: center;
height: 400upx;
}
.logo {
height: 200upx;
width: 200upx;
margin-top: 200upx;
}
.title {
font-size: 36upx;
color: #8f8f94;
}
</style>
<font size=4 face="微软雅黑" >注意:我跳转用的 reLaunch(关闭所有页面重新打开一个界面) ,uni.navigateTo(OBJECT) 是保持当前页面,因为微信 限制 打开的最高层数10层,所以要用reLaunch 跳转才能看到测试效果,不然navigateTo跳转第10界面它就不会动了 像这个样子</font>
 image
image
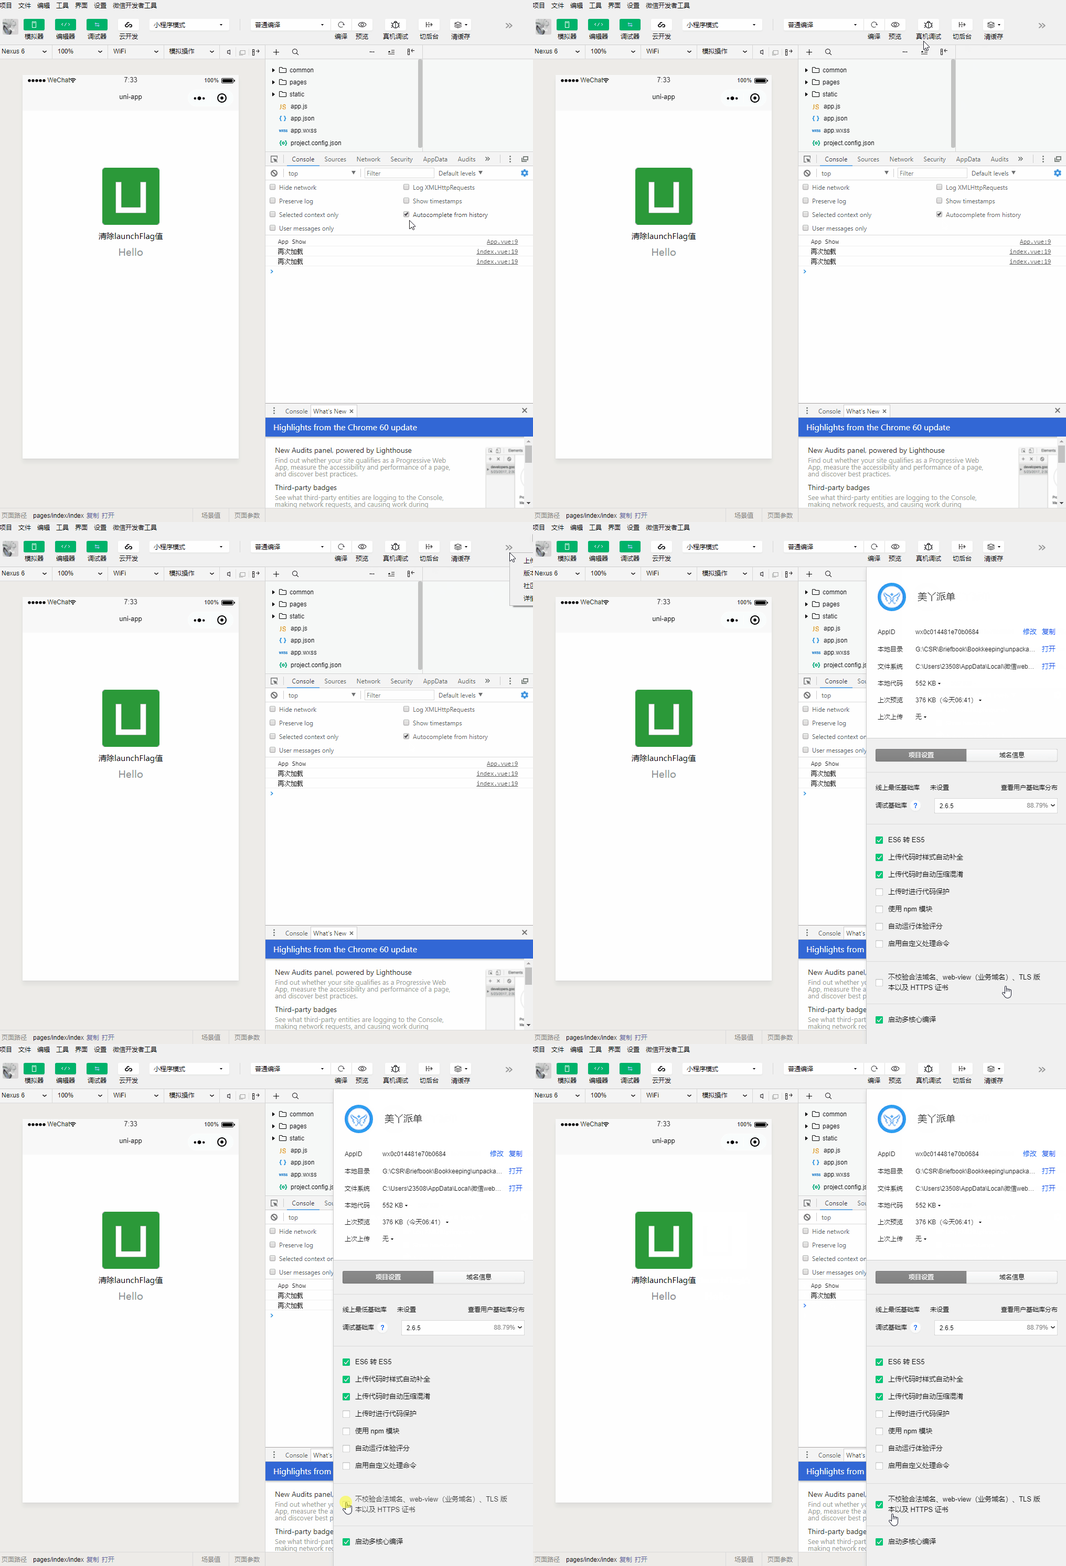
<font size=4 face="微软雅黑" >设置 ”不校验合法域名、web-view(业务域名)、TLS 版本以及 HTTPS 证书 “ 不设置会提示你http错误什么的,两种方式</font>
微信开发工具
 image
image


网友评论