自Google Io 2014发布Material Design以来,非常多知名应用,如Evernote、Teambition、Inbox等都使用了携带多个子按钮的FloatingActionButton。我个人非常喜欢这个效果,但是一个个的去布局写动画,代码还是蛮多的,所以想了想就把整个效果封装起来了。顺便也把它开源了,虽然不是什么很厉害的东西,不过还是希望大家能去点个fork啥的! 哈哈哈哈...😂
OK,话不多说,直接看我下面的Readme。
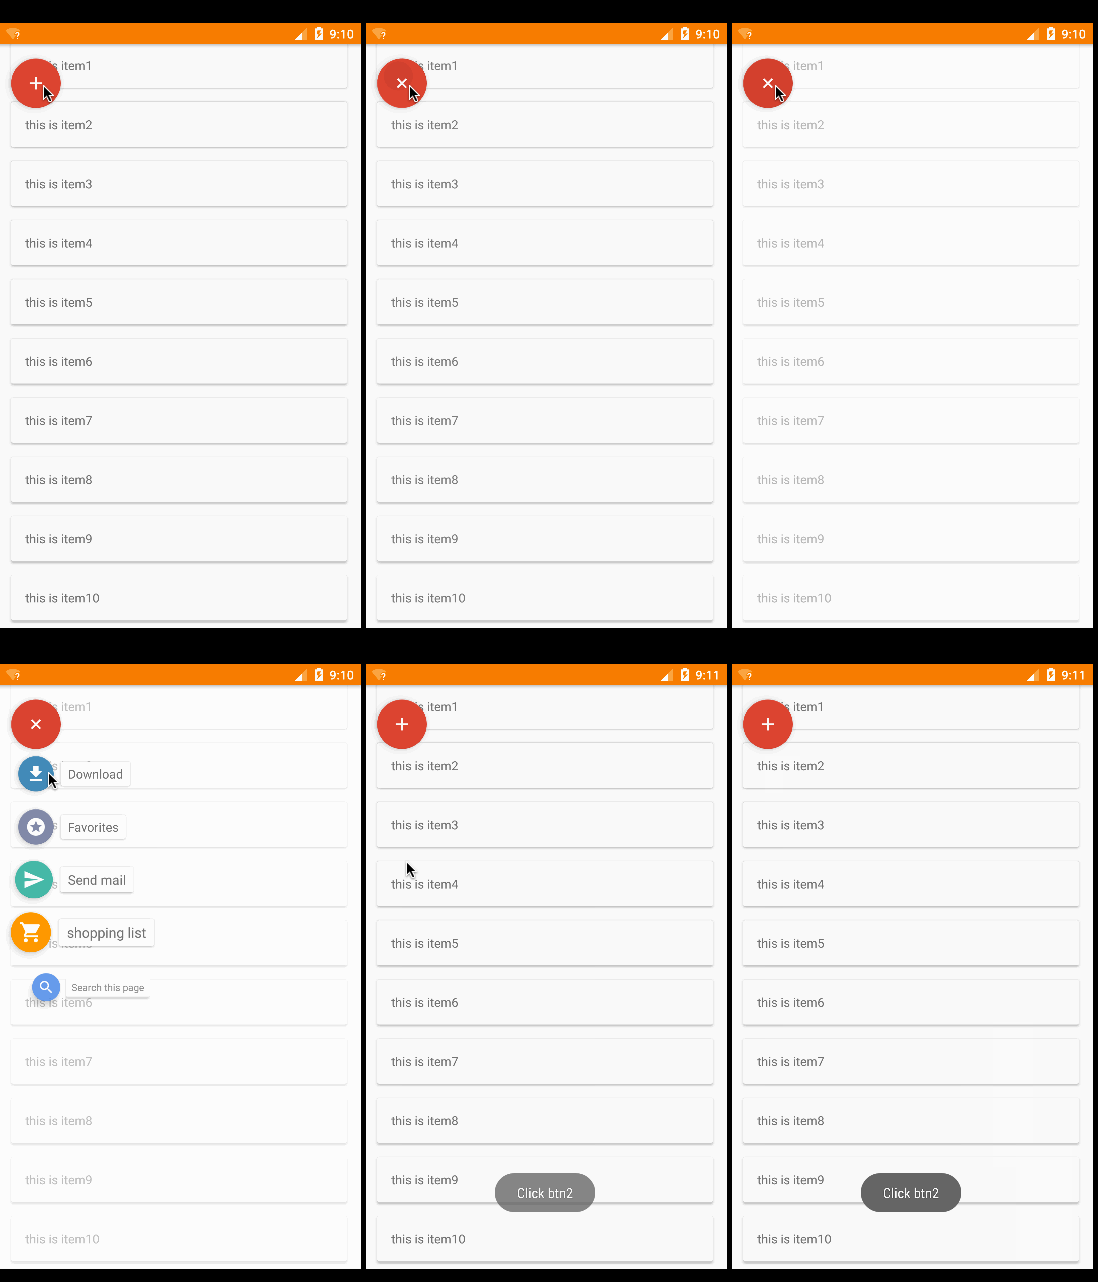
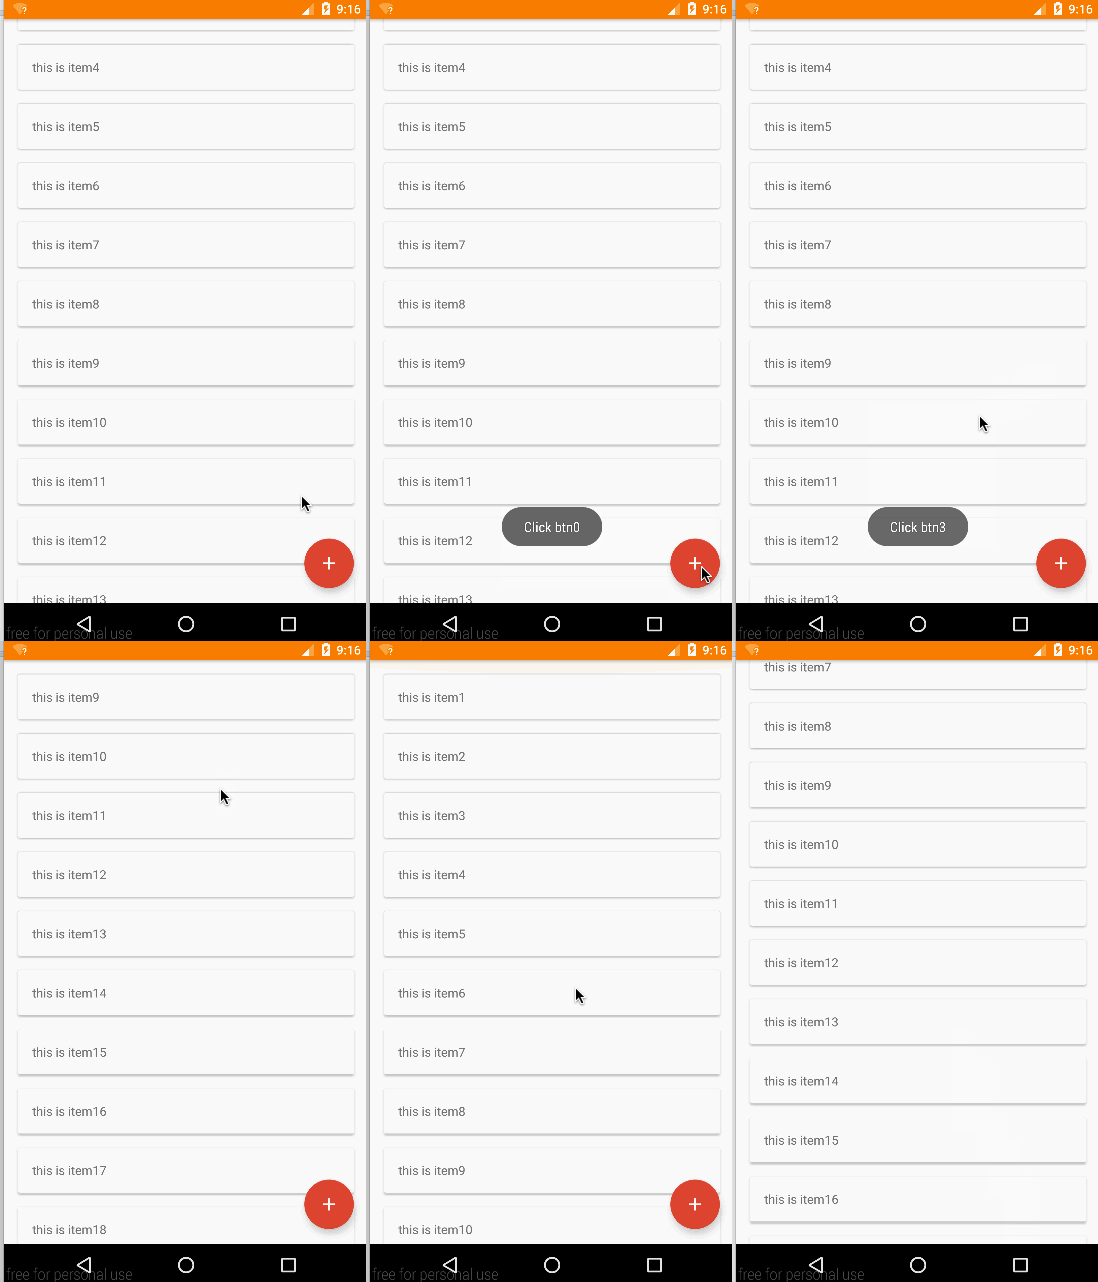 fabs
fabs
注意事项
该控件理论上最低支持到API版本14也就是Android4.0,并且由于是官方Support Library中FloatingActionButton的二次封装,阴影的生成在API21以上和21以下并不太一样,所以在不同版本的系统中的效果会存在一定的差异。
该控件依赖了以下两个support library,使用者无需在项目里再次添加。
com.android.support:design:23.1.1
com.android.support:cardview-v7:23.1.0
项目地址
https://github.com/550609334/FloatingActionButtonPlus
如何使用
实现上图的效果
btns.xml
<com.lzp.floatingactionbuttonplus.FloatingActionButtonPlus
android:id="@+id/FabPlus"
android:layout_width="wrap_content"
android:layout_height="wrap_content"
app:switchFabColor="#DB4537"
app:switchFabIcon="@mipmap/ic_add_white_48dp"
xmlns:android="http://schemas.android.com/apk/res/android"
xmlns:app="http://schemas.android.com/apk/res-auto">

<com.lzp.floatingactionbuttonplus.FabTagLayout
    android:layout_width="wrap_content"
    android:layout_height="wrap_content"
    app:tagText="Download"
    >
    <android.support.design.widget.FloatingActionButton
        android:layout_width="wrap_content"
        android:layout_height="wrap_content"
        android:src="@mipmap/ic_get_app_white_48dp"
        app:backgroundTint="#468cb7"
        app:fabSize="mini" />
</com.lzp.floatingactionbuttonplus.FabTagLayout>

<com.lzp.floatingactionbuttonplus.FabTagLayout
    android:layout_width="wrap_content"
    android:layout_height="wrap_content"
    app:tagText="Favorites"
    >
    <android.support.design.widget.FloatingActionButton
        android:layout_width="wrap_content"
        android:layout_height="wrap_content"
        android:src="@mipmap/ic_stars_white_48dp"
        app:backgroundTint="#818aa7"
        app:fabSize="mini" />
</com.lzp.floatingactionbuttonplus.FabTagLayout>


<com.lzp.floatingactionbuttonplus.FabTagLayout
    android:layout_width="wrap_content"
    android:layout_height="wrap_content"
    app:tagText="Send mail"
    >
    <android.support.design.widget.FloatingActionButton
        android:layout_width="wrap_content"
        android:layout_height="wrap_content"
        android:src="@mipmap/ic_send_white_48dp"
        app:backgroundTint="#4BB7A7"
        app:fabSize="mini" />
</com.lzp.floatingactionbuttonplus.FabTagLayout>

<com.lzp.floatingactionbuttonplus.FabTagLayout
    android:layout_width="wrap_content"
    android:layout_height="wrap_content"
    app:tagText="shopping list"
    >
    <android.support.design.widget.FloatingActionButton
        android:layout_width="wrap_content"
        android:layout_height="wrap_content"
        android:src="@mipmap/ic_shopping_cart_white_48dp"
        app:backgroundTint="#ff9800"
        app:fabSize="mini" />
</com.lzp.floatingactionbuttonplus.FabTagLayout>

<com.lzp.floatingactionbuttonplus.FabTagLayout
    android:layout_width="wrap_content"
    android:layout_height="wrap_content"
    app:tagText="Search this page"
    >

    <android.support.design.widget.FloatingActionButton
        android:layout_width="wrap_content"
        android:layout_height="wrap_content"
        android:src="@mipmap/ic_search_white_48dp"
        app:backgroundTint="#4284E4"
        app:fabSize="mini" />
</com.lzp.floatingactionbuttonplus.FabTagLayout>

</com.lzp.floatingactionbuttonplus.FloatingActionButtonPlus>
activity_main.xml
<?xml version="1.0" encoding="utf-8"?>
<android.support.design.widget.CoordinatorLayout xmlns:android="http://schemas.android.com/apk/res/android"
xmlns:app="http://schemas.android.com/apk/res-auto"
android:layout_width="match_parent"
android:layout_height="match_parent"
>

<android.support.design.widget.AppBarLayout
    android:layout_width="match_parent"
    android:layout_height="wrap_content"
    android:theme="@style/AppTheme.AppBarOverlay">

    <android.support.v7.widget.Toolbar
        android:id="@+id/toolbar"
        android:layout_width="match_parent"
        android:layout_height="56dp"
        android:background="?attr/colorPrimary"
        app:layout_scrollFlags="scroll|enterAlwaysCollapsed"
        app:popupTheme="@style/AppTheme.PopupOverlay" />

</android.support.design.widget.AppBarLayout>

<android.support.v7.widget.RecyclerView xmlns:android="http://schemas.android.com/apk/res/android"
    xmlns:app="http://schemas.android.com/apk/res-auto"
    android:id="@+id/list"
    android:layout_width="match_parent"
    android:layout_height="match_parent"
    app:layout_behavior="@string/appbar_scrolling_view_behavior">

</android.support.v7.widget.RecyclerView>

<include layout="@layout/btns" />

</android.support.design.widget.CoordinatorLayout>
这样就完成了上图的效果。
最外层的com.lzp.floatingactionbuttonplus.FloatingActionButtonPlus会带有一个主按钮。FloatingActionButtonPlus中包含了多个FabTagLayout,而每一个FabTagLayout则就是一个item。FabTagLayout带有一个lable标签,你需要在FabTagLayout中再添加一个FloatingActionButton。请记住为每个item的FloatingActionButton添加上app:fabSize="mini",将其设置为mini型。可通过app:backgroundTint="color"更改这些fab的颜色。
定位
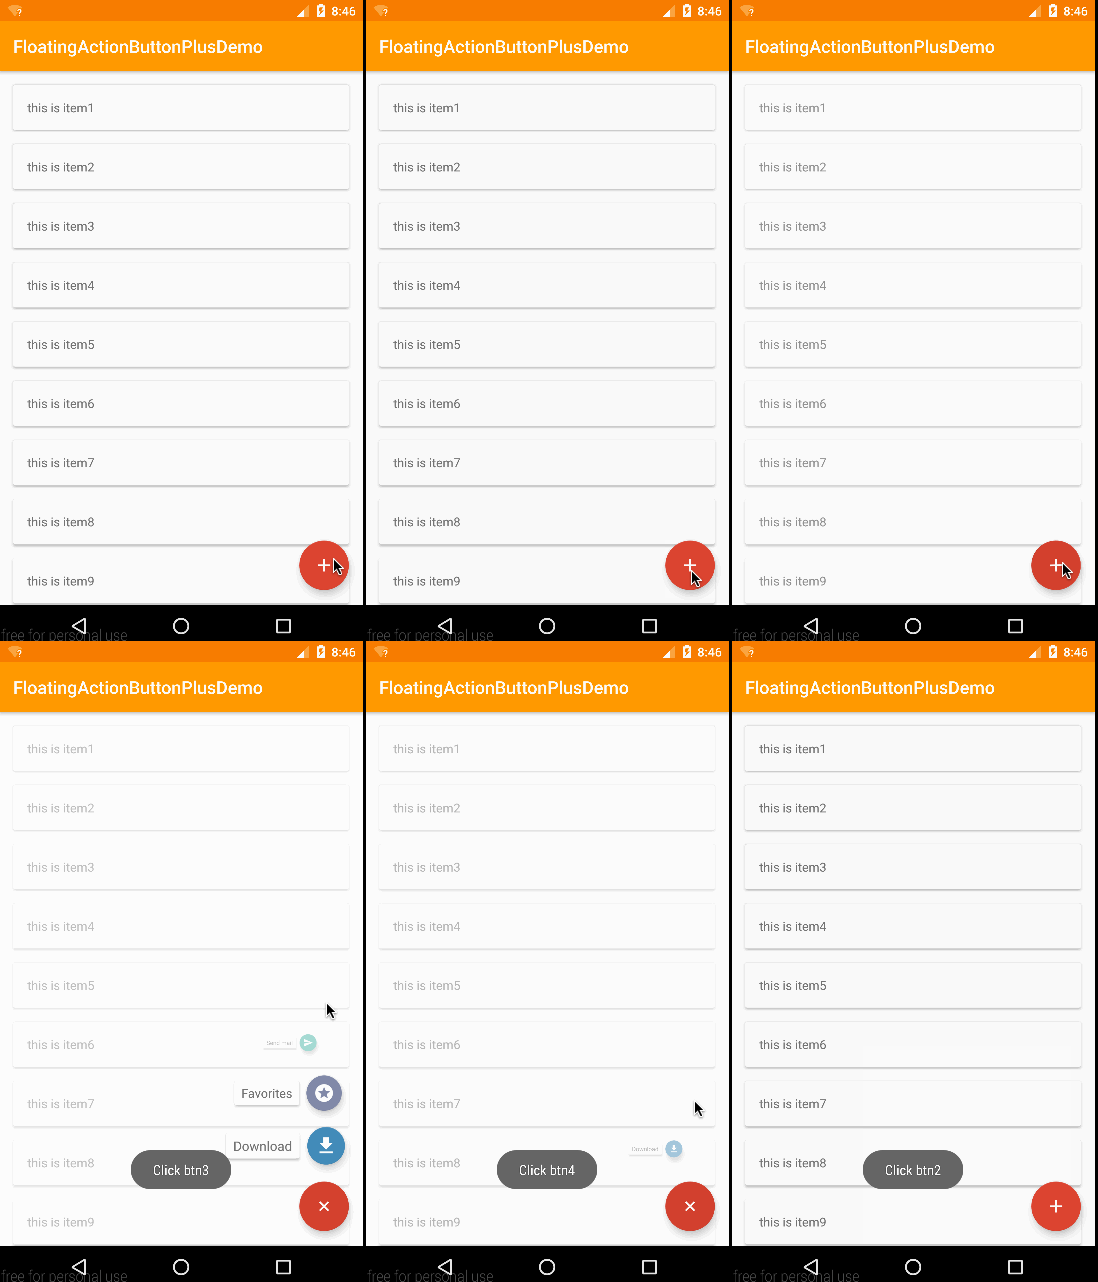 right_bottom
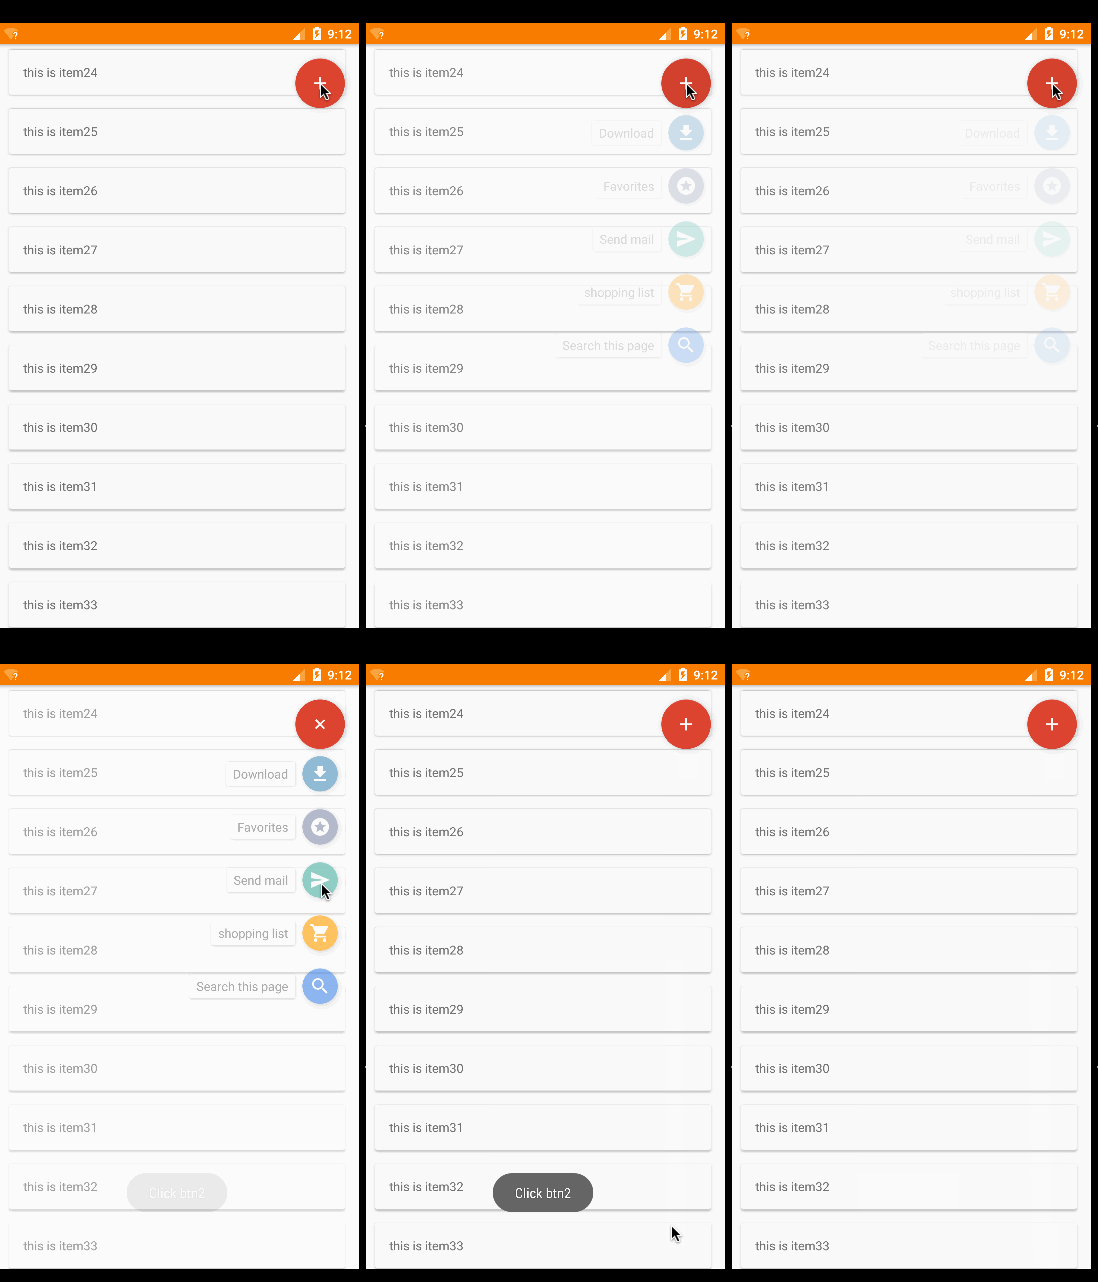 right_top
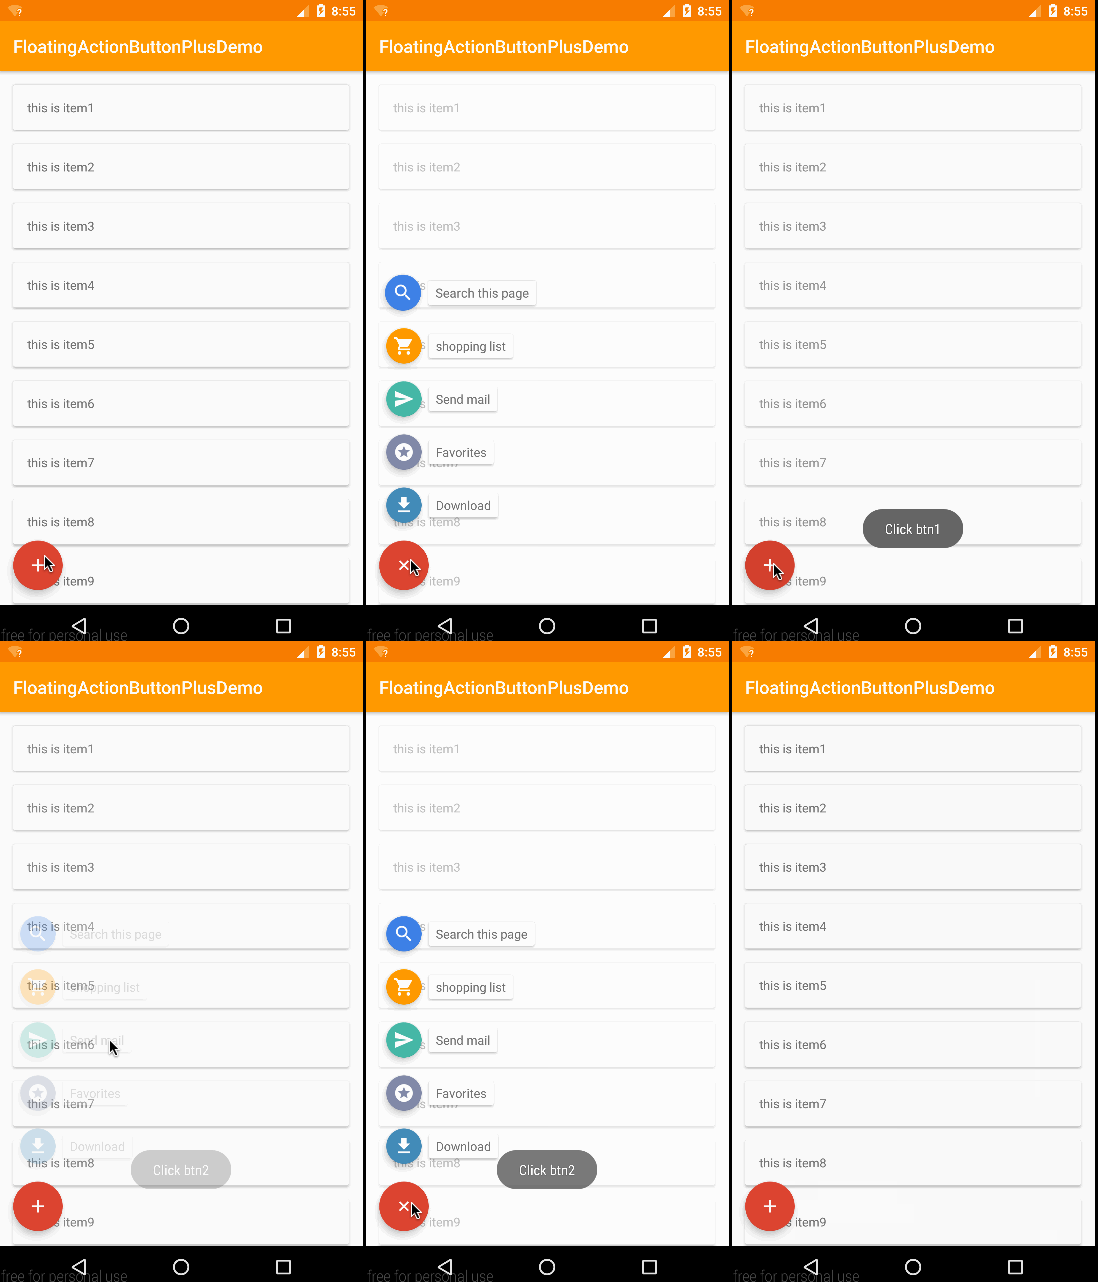 left_bottom
 left_top
GIF会掉帧,实际效果很流畅
如图提供了四种position方式,默认为right_bottom。其他为right_top、left_bottom、left_top。在CoordinatorLayout中建议不要定位到top,会被toolbar挡住。
position可在XML布局中设置,也可在JAVA代码中设置。
XML
在com.lzp.floatingactionbuttonplus.FloatingActionButtonPlus中添加
app:position="left_top"
value还可以是right_bottom、left_bottom、left_top
Java Code
首先有四个常量分别为
  public static final int POS_LEFT_TOP = 0;
  public static final int POS_LEFT_BOTTOM = 1;
  public static final int POS_RIGHT_TOP = 2;
  public static final int POS_RIGHT_BOTTOM = 3;
通过FloatingActionButtonPlus对象设置
  mActionButtonPlus = (FloatingActionButtonPlus) findViewById(R.id.FabPlus);
  mActionButtonPlus.setPosition(FloatingActionButtonPlus.POS_LEFT_TOP);
动画
动画暂时给了三种,分别为fade、scale、bounce,默认为scale。后续会可能会提供接口供使用者扩展。动画同样可以在XML中或Java中设置。
XML
在com.lzp.floatingactionbuttonplus.FloatingActionButtonPlus中添加 fade、scale、bounce三个值中的一个。如:
app:animationMode = "scale"
另可设置动画持续时间,单位为毫秒,默认为150毫秒
app:animationDuration = "300"
Java code
首先有四个常量分别为
public static final int ANIM_FADE = 0;
public static final int ANIM_SCALE = 1;
public static final int ANIM_BOUNCE = 2;
通过FloatingActionButtonPlus对象设置
mActionButtonPlus.setPosition(FloatingActionButtonPlus.POS_LEFT_TOP);
mActionButtonPlus.setAnimation(FloatingActionButtonPlus.ANIM_SCALE);
动画持续时间可通过
mActionButtonPlus.setAnimationDuration(300);
事件
暂时只给出了item的点击事件,如果有更多类型事件的需求,欢迎Email联系我。
mActionButtonPlus.setOnItemClickListener(new FloatingActionButtonPlus.OnItemClickListener() {
        @Override
        public void onItemClick(FabTagLayout tagView, int position) {
            Toast.makeText(MainActivity.this, "Click btn" + position, Toast.LENGTH_SHORT).show();
        }
    });
滑动显示和滑动隐藏
关于滑动显示隐藏,这里有两种方法,
1、使用CoordinatorLayout
使用CoordinatorLayout的话,首先要确保你的外层layout是android.support.design.widget.CoordinatorLayout,如我上面activity_main.xml中的实例代码。之后你需要在com.lzp.floatingactionbuttonplus.FloatingActionButtonPlus中添加上app:layout_behavior="com.lzp.floatingactionbuttonplus.FabBehavior",如下
<com.lzp.floatingactionbuttonplus.FloatingActionButtonPlus
android:id="@+id/FabPlus"
android:layout_width="wrap_content"
android:layout_height="wrap_content"
app:switchFabColor="#DB4537"
app:switchFabIcon="@mipmap/ic_add_white_48dp"
app:layout_behavior="com.lzp.floatingactionbuttonplus.FabBehavior"
xmlns:android="http://schemas.android.com/apk/res/android"
xmlns:app="http://schemas.android.com/apk/res-auto">

</com.lzp.floatingactionbuttonplus.FloatingActionButtonPlus>
2、监听滑动距离(judge scorll distance)
在没有使用CoordinatorLayout的情况下,我给出了两个public method。 分别为showFab() 和 hideFab()。通过FloatingActionButtonPlus对象去调用。所以你如果想要实现通过这个效果,需要你去获取当前Scroll的距离。例如在RecyclerView中你可以这么写:
 mRecyclerView.addOnScrollListener(new RecyclerView.OnScrollListener() {
        @Override
        public void onScrolled(RecyclerView recyclerView, int dx, int dy) {
            super.onScrolled(recyclerView, dx, dy);
            if (recyclerView.getScrollState() == RecyclerView.SCROLL_STATE_DRAGGING) {
                if (dy > 0) {
                    mActionButtonPlus.hideFab();
                } else {
                    mActionButtonPlus.showFab();
                }
            }
        }
    });
更多设置
XML
com.lzp.floatingactionbuttonplus.FloatingActionButtonPlus
 app:switchFabIcon="@mipmap/ic_add_white_48dp"   <!--设置主Fab的icon图标-->
 app:switchFabColor="#DB4537"                    <!--设置主Fab的颜色-->
 app:mBackgroundColor="#99ffffff"                <!--设置item展开后的背景颜色,默认为alpha99的白色-->
com.lzp.floatingactionbuttonplus.FabTagLayout
app:tagText="text" <!--设置item中lable中显示的文字-->
Java Code
com.lzp.floatingactionbuttonplus.FloatingActionButtonPlus
mActionButtonPlus.setContentIcon(getResources().getDrawable(R.mipmap.ic_add_white_48dp)); //设置主Fab的icon图标
mActionButtonPlus.setRotateValues(45); //设置主Fab被点击时旋转的度数,默认为45度
boolean state = mActionButtonPlus.getSwitchFabDisplayState();  //获取当前Fab的显示状态,显示时返回true,隐藏返回false
com.lzp.floatingactionbuttonplus.FabTagLayout
tagView.setTagText("text"); //设置label中显示的文字
其他
关于为什么不直接在FabTagLayout里集成FloatingActionButton
主要是因为Google并没有给出用java代码设置FloatingActionButton的size的方法,所以没办法设置成mini型。我试过用反射去更改FloatingActionButton中的mSize这个private变量,在api21之后,可行,但21以下就会出现很多问题,例如icon不会跟着变小,阴影会变成矩形。这是因为在FloatingActionButton中是根据mSize的值去绘制阴影和决定icon大小的。而这一切操作都是在它的constructor中完成,所以我选择了让使用者来指定每一个FloatingActionButton。 当然日后也许我会试着制作一个独立的FloatingActionButton来解决这个问题。
关于遇到Bug
如果出现Bug,或者你有什么建议或需求,可以Email连系我。


网友评论