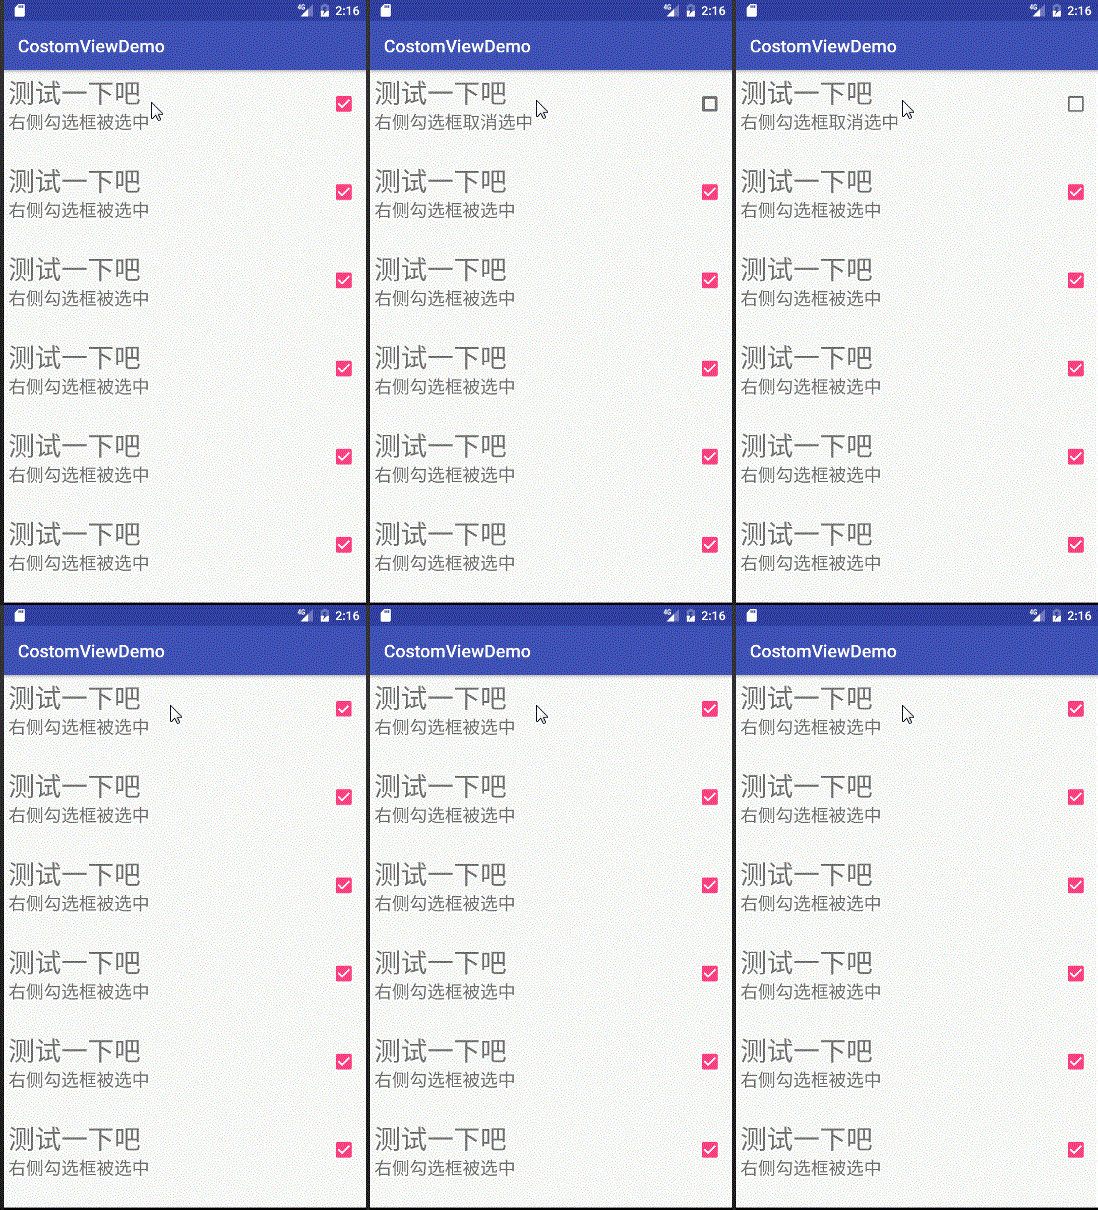
自定义View之自定义设置界面栏位
在app的应用设置中经常会有如下所示的设置样式,正好学习自定义view,下面我们就先实现一个;
 效果
效果
1.开启新的自定义view
public class ComboBox extends RelativeLayout{

    public ComboBox(Context context) {
        super(context);
    }

    public ComboBox(Context context, AttributeSet attrs) {
        super(context, attrs);
    }

    public ComboBox(Context context, AttributeSet attrs, int defStyleAttr) {
        super(context, attrs, defStyleAttr);
    }
  }
2.设置到xml中
<?xml version="1.0" encoding="utf-8"?>
<LinearLayout xmlns:android="http://schemas.android.com/apk/res/android"
    xmlns:tools="http://schemas.android.com/tools"
    android:id="@+id/activity_main"
    android:layout_width="match_parent"
    android:layout_height="match_parent"
    android:orientation="vertical"
    tools:context="com.skkk.ww.costomviewdemo.MainActivity">
        <com.skkk.ww.costomviewdemo.ComboBox
            android:id="@+id/cb_test"
            combo:title="测试一下吧"
            combo:checkedContent="右侧勾选框被选中"
            combo:unCheckContent="右侧勾选框取消选中"
            combo:ischeck="true"
            android:layout_width="match_parent"
            android:layout_height="100dp" />
</LinearLayout>
其实这个时候运行项目就可以显示出自定义view了,但是我没什么都没有设置,所以只是一片空白;
3.自定义view布局
-
自定义view布局
<?xml version="1.0" encoding="utf-8"?> <LinearLayout xmlns:android="http://schemas.android.com/apk/res/android" android:layout_width="match_parent" android:layout_height="wrap_content" android:orientation="horizontal"> <LinearLayout android:id="@+id/ll_left" android:layout_weight="1" android:layout_margin="5dp" android:layout_width="match_parent" android:layout_height="wrap_content" android:orientation="vertical"> <TextView android:id="@+id/tv_title_cb" android:text="Title" android:textSize="30dp" android:layout_width="match_parent" android:layout_height="wrap_content" /> <TextView android:id="@+id/tv_content_cb" android:textSize="20dp" android:text="Content" android:layout_width="match_parent" android:layout_height="wrap_content" /> </LinearLayout> <CheckBox android:id="@+id/cb_select_cb" android:layout_marginRight="10dp" android:layout_gravity="center" android:layout_width="wrap_content" android:layout_height="match_parent" /> </LinearLayout> -
引用布局
private void initUI(Context context) {
    LayoutInflater.from(context).inflate(R.layout.layout_combobox,this,true);
    tvTitle= (TextView) findViewById(R.id.tv_title_cb);
    tvContent= (TextView) findViewById(R.id.tv_content_cb);
    cbCombo= (CheckBox) findViewById(R.id.cb_select_cb);
    llLeft= (LinearLayout) findViewById(R.id.ll_left);
}
当然
initUI方法还需要加入到构造方法中,不然就没效果了。 效果
效果
4.自定义属性
通过以上的操作我们就可以得到一个像模像样的设置栏位了,当然,所有的属性我们都需要在java文件中修改,这不是我们想要的,我们如何才能向正常的控件一样在xml中定义各种属性呢?这就需要用的自定义属性了。
-
定义属性
1.首先我们需要新建一个文件
attrs.xml,如下图所示: attrs.xml
2.然后具体定义属性内容:
<?xml version="1.0" encoding="utf-8"?> <resources> <declare-styleable name="ComboBox"> <attr name="title" format="string"/> <attr name="checkedContent" format="string"/> <attr name="unCheckContent" format="string"/> <attr name="ischeck" format="boolean"/> </declare-styleable> </resources> -
引用属性
private String title,checkContent,unCheckContent;
private boolean isChecked;
private TextView tvTitle,tvContent;
private CheckBox cbCombo;

private void initAttr(Context context, AttributeSet attrs) {
    TypedArray ta=context.obtainStyledAttributes(attrs,
            R.styleable.ComboBox);

    title=ta.getString(R.styleable.ComboBox_title);
    checkContent=ta.getString(R.styleable.ComboBox_checkedContent);
    unCheckContent=ta.getString(R.styleable.ComboBox_unCheckContent);
    isChecked=ta.getBoolean(R.styleable.ComboBox_ischeck,false);

    //获取完值之后我们需要调用recycle()方法来避免重新创建的时候的错误
    ta.recycle();
}
我们通过获取
TyoedArray对象来获取到我们自定义的属性,获取到属性之后在赋值到我们定义的内部属性里,这样就可以调用了tvTitle.setText(title); tvContent.setText(isChecked?checkContent:unCheckContent); cbCombo.setChecked(isChecked); cbCombo.setOnCheckedChangeListener(new CompoundButton.OnCheckedChangeListener() { @Override public void onCheckedChanged(CompoundButton buttonView, boolean isChecked) { tvContent.setText(isChecked?checkContent:unCheckContent); } }); -
使用属性
<?xml version="1.0" encoding="utf-8"?>
<LinearLayout xmlns:android="http://schemas.android.com/apk/res/android"
    xmlns:tools="http://schemas.android.com/tools"
    xmlns:combo="http://schemas.android.com/apk/res-auto"
    android:id="@+id/activity_main"
    android:layout_width="match_parent"
    android:layout_height="match_parent"
    android:orientation="vertical"
    tools:context="com.skkk.ww.costomviewdemo.MainActivity">

    <com.skkk.ww.costomviewdemo.CostomScrollView
        android:layout_width="match_parent"
        android:layout_height="wrap_content">

        <ImageView
            android:scaleType="fitXY"
            android:layout_width="match_parent"
            android:layout_height="100dp"
            android:src="@mipmap/ic_launcher"
            />
        <com.skkk.ww.costomviewdemo.ComboBox
            android:id="@+id/cb_test"
            combo:title="这里是我们定义的标题"
            combo:checkedContent="选中了,wow!"
            combo:unCheckContent="没被选中,好烦躁!"
            combo:ischeck="true"
            android:layout_width="match_parent"
            android:layout_height="100dp" />
</LinearLayout>
这样我们可以在xml中定义我们的属性了,效果如下:
 attr2
attr2
 attr3
attr3
5.自定义方法
能够在xml中设置属性还不够,我们还要在java代码中设置属性,接下来构造对应的设置方法
-
设置基本属性getter&setter方法
/** * 设置标题 * @param title */ public void setTitle(String title){ tvTitle.setText(title); } /** * 设置勾选显示文本 * @param checkContent */ public void setCheckContent(String checkContent) { this.checkContent = checkContent; } /** * 设置未勾选显示文本 * @param unCheckContent */ public void setUnCheckContent(String unCheckContent) { this.unCheckContent = unCheckContent; } /** * 设置是否勾选 * @param checked */ public void setChecked(boolean checked){ cbCombo.setChecked(checked); } /** * 返回是否勾选 * @return boolean */ public boolean isChecked(){ return cbCombo.isChecked(); } -
设置点击事件
当然还有自定义view的点击事件,我得需求是除开
CheckBox之外的部分响应,也就是上面对上面初始化的左边的LinearLayout进行点击事件设置/** * 设置点击事件 * @param listener 对左侧文本LinearLayout设置点击事件 */ public void setLeftContainerClickListener(OnClickListener listener){ this.setOnClickListener(listener); }
6.正式使用
public class MainActivity extends AppCompatActivity {
    private ComboBox cbTest;
    private String TAG=this.getClass().getSimpleName();

    @Override
    protected void onCreate(Bundle savedInstanceState) {
        super.onCreate(savedInstanceState);
        setContentView(R.layout.activity_main);
        cbTest = (ComboBox) findViewById(R.id.cb_test);
        cbTest.setLeftContainerClickListener(new View.OnClickListener() {
            @Override
            public void onClick(View v) {
                if (cbTest.isChecked()){
                    Logger.t(TAG).i("设置勾选为TRUE");
                    cbTest.setChecked(false);
                }else {
                    cbTest.setChecked(true);
                }
            }
        });
    }
}
这样就获得了一个简单的自定义view!


网友评论