这一篇中,我们继续继续进行我们的坦克大战。
位置信息数据结构
在游戏设计过程中,需要记录大量的位置信息,如果仅仅使用(x,y)坐标很容易出错。这一篇中,我们先定义两个简单的数据结构用来保存点和矩形的信息。
在项目中新建Model目录,创建下面四个文件:

代码如下:
Point.h
#ifndef __POINT_H__
#define __POINT_H__

class Point
{
public:
    Point(int x = 0, int y = 0) : m_x(x), m_y(y){};
    ~Point(){};

    Point& operator=(const Point &p)
    {
        m_x = p.m_x;
        m_y = p.m_y;

        return *this;
    }

    void Set(int x, int y);

    void SetX(int x);
    void SetY(int y);

    int GetX();
    int GetY();


private:
    int m_x;
    int m_y;
};

#endif
这个头文件创建了一个Point类,有两个成员变量m_x,m_y用来记录一个点的横、纵坐标。一组public方法用来完成给对象赋值和读取坐标值的操作。
这里我们用到了C++的运算符重载功能,将“=”功能进行重载,方便我们用一个Point对象给另一个Point对象赋值,同时也能够使我们将Point作为参数进行传递。
Point.cpp
#include "Point.h"

void Point::Set(int x, int y)
{
    m_x = x;
    m_y = y;
}

void Point::SetX(int x)
{
    m_x = x;
}

void Point::SetY(int y)
{
    m_y = y;
}

int Point::GetX()
{
    return m_x;
}

int Point::GetY()
{
    return m_y;
}
这个文件中是对Point类的实现,大家一看就明白。
这里需要强调的是,在类的封装过程中有一个非常重要的原则是不允许将成员变量用public的方法暴露在外。如果类的外部代码能够直接对类成员变量进行修改的话,程序将很不安全。正确的方法是像我们这样实现一组Get和Set方法进行管理。这样虽然代码量多了一些,但对后期维护带来的帮助是不可估量的。
Rect.h
#ifndef __RECTANGLE_H__
#define __RECTANGLE_H__

#include "Point.h"

class Rect
{
public:
    Rect(int x1 = 0, int y1 = 0, int x2 = 0, int y2 = 0) : m_startPoint(x1, y1), m_endPoint(x2, y2){};
    Rect(const Point p1, const Point p2) : m_startPoint(p1), m_endPoint(p2){};
    ~Rect(){};

    Rect& operator=(const Rect &rect)
    {
        m_startPoint = rect.GetStartPoint();
        m_endPoint = rect.GetEndPoint();

        return *this;
    }

    void Set(const Point pStart, const Point pEnd);
    void Set(int x1, int y1, int x2, int y2);

    void SetStartPoint(const Point p);
    void SetEndPoint(const Point p);

    Point GetStartPoint() const;
    Point GetEndPoint() const;

    int GetWidth();
    int GetHeight();

private:
    void Check();

    Point m_startPoint;
    Point m_endPoint;
};

#endif
Rect类是用来定义矩形的,它的成员变量是两个Point对象,分别表示矩形的左上角和右下角。这里我们强行规定m_startPoint表示左上角,m_endPoint表示右下角。如果创建对象时两个点顺序反了,Check()函数会自动把它们调整过来。
这里需要注意,GetStartPoint()和GetEndPoint()两个函数都通过const修饰,表示返回值不能被修改。为什么要这么实现呢,因为这个函数的结果将会传进EasyX接口中,而这些接口大部分都要求参数是const的,如果这里不做修饰,在传参时会报错。
Rect.cpp
#include "Rect.h"

void Rect::Set(Point pStart, Point pEnd)
{
    m_startPoint = pStart;
    m_endPoint = pEnd;
}

void Rect::Set(int x1, int y1, int x2, int y2)
{
    m_startPoint.Set(x1, y1);
    m_endPoint.Set(x2, y2);
}

void Rect::SetStartPoint(Point p)
{
    m_startPoint = p;
}

void Rect::SetEndPoint(Point p)
{
    m_endPoint = p;
}

Point Rect::GetStartPoint() const
{
    return m_startPoint;
}

Point Rect::GetEndPoint() const
{
    return m_endPoint;
}

int Rect::GetWidth()
{
    return m_endPoint.GetX() - m_startPoint.GetX();
}

int Rect::GetHeight()
{
    return m_endPoint.GetY() - m_startPoint.GetY();
}

void Rect::Check()
{
    if (m_startPoint.GetX() > m_endPoint.GetX() || m_startPoint.GetY() > m_endPoint.GetY())
    {
        Point p = m_startPoint;
        m_startPoint = m_endPoint;
        m_endPoint = p;
    }
}
这个文件中实现了Rect类的成员函数。
主战坦克升级
Tank.h
首先,我们对Tank类进行修改,新增一部分功能,代码如下:
#ifndef __TANK_H__
#define __TANK_H__

#include "Graphic.h"

enum Dir { UP, DOWN, LEFT, RIGHT };

class Tank
{
public:
    // 绘图
    virtual void Display() = 0;

    // 移动
    virtual void Move() = 0;

protected:
    virtual void CalculateSphere() = 0;

    Point m_pos;
    Rect m_rectSphere; // 势力范围

    COLORREF m_color;

    Dir m_dir;

    int m_step;
};

#endif
我们把坐标用Point对象m_pos表示,又添加了一个新属性m_rectSphere,它是一个Rect对象,用来记录坦克的形状范围。之前我们的坦克总是用一组坐标来表示,这个坐标是坦克的中心点,所有跟坦克相关的行为都通过这个点来计算位置,实现起来有些复杂,有了这个Rect对象,相当于我们记录了这个坦克所在的矩形的位置,这样在绘制坦克时更容易计算坐标。

MainTank.h
#ifndef __MAIN_TANK__
#define __MAIN_TANK__

#include "Tank.h"

class MainTank : public Tank
{
public:
    MainTank()
    {
        m_pos.Set(300, 300);

        this->CalculateSphere();

        m_color = YELLOW;
        m_dir = Dir::UP;
        m_step = 2;
    }

    ~MainTank(){}

    // 设置行驶方向
    void SetDir(Dir dir);
    void Display();
    void Move();

protected:
    void CalculateSphere();

    // 绘制坦克主体
    void DrawTankBody();
};

#endif
这个文件中没有太大的修改,只是在成员变量初始化时做了一些调整。主战坦克的颜色改成了黄色,初始化后调用CalculateSphere()函数计算出矩形位置。
MainTank.cpp
#include "MainTank.h"

void MainTank::SetDir(Dir dir)
{
    m_dir = dir;
}

void MainTank::DrawTankBody()
{
    fillrectangle(m_pos.GetX() - 6, m_pos.GetY() - 6, m_pos.GetX() + 6, m_pos.GetY() + 6);

    switch (m_dir)
    {
    case UP:
    case DOWN:
        fillrectangle(m_rectSphere.GetStartPoint().GetX(), m_rectSphere.GetStartPoint().GetY(),
            m_rectSphere.GetStartPoint().GetX() + 4, m_rectSphere.GetEndPoint().GetY());
        fillrectangle(m_rectSphere.GetEndPoint().GetX() - 4, m_rectSphere.GetStartPoint().GetY(),
            m_rectSphere.GetEndPoint().GetX(), m_rectSphere.GetEndPoint().GetY());
        break;
    case LEFT:
    case RIGHT:
        fillrectangle(m_rectSphere.GetStartPoint().GetX(), m_rectSphere.GetStartPoint().GetY(),
            m_rectSphere.GetEndPoint().GetX(), m_rectSphere.GetStartPoint().GetY() + 4);
        fillrectangle(m_rectSphere.GetStartPoint().GetX(), m_rectSphere.GetEndPoint().GetY() - 4,
            m_rectSphere.GetEndPoint().GetX(), m_rectSphere.GetEndPoint().GetY());
        break;
    default:
        break;
    }
}

void MainTank::Display()
{
    COLORREF fill_color_save = getfillcolor();
    COLORREF color_save = getcolor();

    setfillcolor(m_color);
    setcolor(m_color);

    DrawTankBody();

    switch (m_dir)
    {
    case UP:
        line(m_pos.GetX(), m_pos.GetY(), m_pos.GetX(), m_pos.GetY() - 15);
        break;
    case DOWN:
        line(m_pos.GetX(), m_pos.GetY(), m_pos.GetX(), m_pos.GetY() + 15);
        break;
    case LEFT:
        line(m_pos.GetX(), m_pos.GetY(), m_pos.GetX() - 15, m_pos.GetY());
        break;
    case RIGHT:
        line(m_pos.GetX(), m_pos.GetY(), m_pos.GetX() + 15, m_pos.GetY());
        break;
    default:
        break;
    }

    setcolor(color_save);
    setfillcolor(fill_color_save);
}

void MainTank::Move()
{
    switch (m_dir)
    {
    case UP:
        m_pos.SetY(m_pos.GetY() - m_step);
        if (m_pos.GetY() < Graphic::GetBattleGround().GetStartPoint().GetY())
            m_pos.SetY(Graphic::GetBattleGround().GetEndPoint().GetY() - 1);
        break;
    case DOWN:
        m_pos.SetY(m_pos.GetY() + m_step);
        if (m_pos.GetY() > Graphic::GetBattleGround().GetEndPoint().GetY())
            m_pos.SetY(Graphic::GetBattleGround().GetStartPoint().GetY() + 1);
        break;
    case LEFT:
        m_pos.SetX(m_pos.GetX() - m_step);
        if (m_pos.GetX() < Graphic::GetBattleGround().GetStartPoint().GetX())
            m_pos.SetX(Graphic::GetBattleGround().GetEndPoint().GetX() - 1);
        break;
    case RIGHT:
        m_pos.SetX(m_pos.GetX() + m_step);
        if (m_pos.GetX() > Graphic::GetBattleGround().GetEndPoint().GetX())
            m_pos.SetX(Graphic::GetBattleGround().GetStartPoint().GetX() + 1);
        break;
    default:
        break;
    }

    CalculateSphere();
}

void MainTank::CalculateSphere()
{
    switch (m_dir)
    {
    case UP:
    case DOWN:
        m_rectSphere.Set(m_pos.GetX() - 13, m_pos.GetY() - 10, m_pos.GetX() + 13, m_pos.GetY() + 10);
        break;
    case LEFT:
    case RIGHT:
        m_rectSphere.Set(m_pos.GetX() - 10, m_pos.GetY() - 13, m_pos.GetX() + 10, m_pos.GetY() + 13);
        break;
    default:
        break;
    }
}
这个文件修改较多,是不是有些眼花缭乱了。
- DrawTankBody()
这个函数的参数被拿掉了,在这里我们通过坦克当前方向来判断它的形状。
在绘制履带时,我们利用了m_rectSphere的位置坐标,虽然看起来代码变多了,但只有一个数字4是无意义的,它代表履带的宽度。如果这个宽度需要经常调整的话,我们还可以考虑把它用一个成员变量管理起来。
在判断坦克形状时,我们利用了switch的一个特性,通过故意少写break关键字,让两个判断结果公用一段代码,这个早已经讲过,这里不多说了。
- Display()
之前我们用setfillcolor设置了填充颜色,这里我们加入了setcolor,这样画出来的坦克边框也是我们设置的颜色。
- Move()
这个函数中,比较奇怪的是出现了一个没见过的函数Graphic::GetBattleGround()。我们今天要给坦克划定一个运行区域,不能让它满屏幕行驶了,这个后面再说。
这里要注意,每移动一次都需要调用CalculateSphere()方法重新计算坦克区域。
- CalculateSphere()
这个很简单,计算出左上角和右下角的Point位置即可。
更新画布
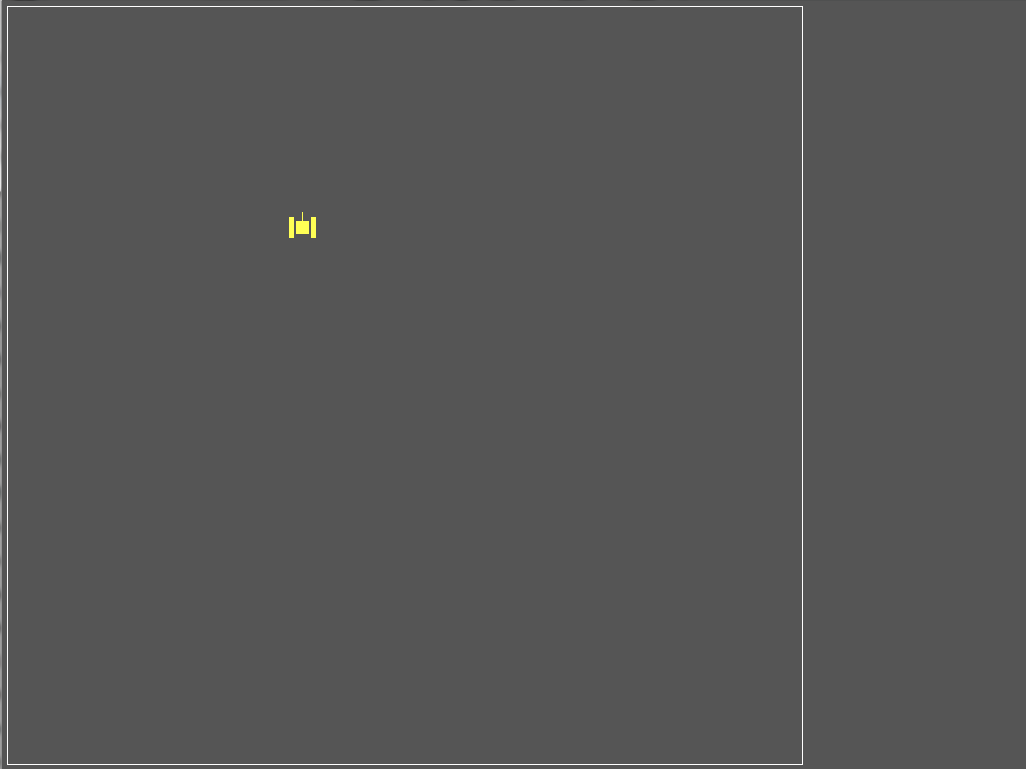
之前的画布颜色太深,我们要做修改。另外,我们后面需要在窗口上显示游戏信息,因此,要在右边留出一部分空间。我们给坦克划定一个新的区域,让它们在里面行驶。
Graphic.h
#ifndef __GRAPHIC_H__
#define __GRAPHIC_H__

#include <graphics.h>

#include "model/Rect.h"

#define SCREEN_WIDTH    1024
#define SCREEN_HEIGHT   768

#define BATTLE_GROUND_X1 5
#define BATTLE_GROUND_Y1 5
#define BATTLE_GROUND_X2 800
#define BATTLE_GROUND_Y2 (SCREEN_HEIGHT - BATTLE_GROUND_Y1)

class Graphic
{
public:
    static void Create();
    static void Destroy();

    static void DrawBattleGround();

    static int GetScreenWidth();
    static int GetScreenHeight();

    static Rect GetBattleGround();

private:
    static Rect m_rectScreen;
    static Rect m_rectBattleGround;
};

#endif
文件中通过一组宏来定义战场区域的位置。另外通过m_rectBattleGround这个Rect对象来保存。
细心的读者应该发现了,我们在引用Rect类时用了下面这句话:
#include "model/Rect.h"
Rect.h文件的路径需要加上model目录,否则找不到。需要说明的是这个目录指的是项目文件夹下真实存在的model目录。如果你用的是VS,"Solution Explorer"中新建的文件夹是逻辑目录,不需要加载include路径中。
简单说,include后面写的路径是给编译器看的,它只认Windows资源管理器中看到的路径,与IDE中的逻辑路径无关。
Graphic.cpp
#include "Graphic.h"

Rect Graphic::m_rectScreen;
Rect Graphic::m_rectBattleGround;

void Graphic::Create()
{
    m_rectScreen.Set(0, 0, SCREEN_WIDTH, SCREEN_HEIGHT);
    initgraph(SCREEN_WIDTH, SCREEN_WIDTH);
    setbkcolor(DARKGRAY);

    m_rectBattleGround.Set(BATTLE_GROUND_X1, BATTLE_GROUND_Y1, BATTLE_GROUND_X2, BATTLE_GROUND_Y2);
}

void Graphic::Destroy()
{
    closegraph();
}

void Graphic::DrawBattleGround()
{
    rectangle(m_rectBattleGround.GetStartPoint().GetX(), m_rectBattleGround.GetStartPoint().GetY(),
        m_rectBattleGround.GetEndPoint().GetX(), m_rectBattleGround.GetEndPoint().GetY());
}

int Graphic::GetScreenWidth()
{
    return SCREEN_WIDTH;
}

int Graphic::GetScreenHeight()
{
    return SCREEN_HEIGHT;
}

Rect Graphic::GetBattleGround()
{
    return m_rectBattleGround;
}
代码在创建画布是,重新指定了背景颜色。DrawBattleGround()函数在屏幕上画出了战场的范围。
main.cpp
主函数中,我们只需要再循环中添加一个DrawBattleGround函数的调用即可。
if (!skip)
{
    cleardevice();

    Graphic::DrawBattleGround();

    mainTank.Move();
    mainTank.Display();
}
好了,运行一下程序,看看效果吧。

敌人坦克
屏幕上只有一个自己的坦克看着有些孤单,我们再添加上些敌人的坦克。
新建文件EnemyTank.h和EnemyTank.cpp。实现一个敌人坦克类。
EnemyTank.h
#ifndef __ENEMY_TANK__
#define __ENEMY_TANK__

#include "Tank.h"

class EnemyTank : public Tank
{
public:
    EnemyTank()
    {
        RandomTank();
    }

    ~EnemyTank(){}

    void Display();
    void Move();

protected:
    void CalculateSphere();
    void RandomTank();
};

#endif
有了Tank这个抽象类,所有的坦克都从它继承就好了。除了抽象类中继承的函数之外,我们加了一个RandomTank()用来随机地在战场区域生成一个坦克。
EnemyTank.cpp
#include "EnemyTank.h"

void EnemyTank::RandomTank()
{
    m_pos.SetX(rand() % Graphic::GetBattleGround().GetWidth());
    m_pos.SetY(rand() % Graphic::GetBattleGround().GetHeight());
    m_color = WHITE;
    m_dir = (Dir)(Dir::UP + (rand() % 4));
    m_step = 2;
}

void EnemyTank::Display()
{
    COLORREF fill_color_save = getfillcolor();
    COLORREF color_save = getcolor();

    setfillcolor(m_color);
    setcolor(m_color);

    fillrectangle(m_pos.GetX() - 6, m_pos.GetY() - 6, m_pos.GetX() + 6, m_pos.GetY() + 6);

    fillrectangle(m_rectSphere.GetStartPoint().GetX(), m_rectSphere.GetStartPoint().GetY(),
        m_rectSphere.GetStartPoint().GetX() + 4, m_rectSphere.GetStartPoint().GetY() + 4);
    fillrectangle(m_rectSphere.GetEndPoint().GetX() - 4, m_rectSphere.GetStartPoint().GetY(),
        m_rectSphere.GetEndPoint().GetX(), m_rectSphere.GetStartPoint().GetY() + 4);

    fillrectangle(m_rectSphere.GetStartPoint().GetX(), m_rectSphere.GetEndPoint().GetY() - 4,
        m_rectSphere.GetStartPoint().GetX() + 4, m_rectSphere.GetEndPoint().GetY());
    fillrectangle(m_rectSphere.GetEndPoint().GetX() - 4, m_rectSphere.GetEndPoint().GetY() - 4,
        m_rectSphere.GetEndPoint().GetX(), m_rectSphere.GetEndPoint().GetY());

    switch (m_dir)
    {
    case UP:
        line(m_pos.GetX(), m_pos.GetY(), m_pos.GetX(), m_pos.GetY() - 15);
        break;
    case DOWN:
        line(m_pos.GetX(), m_pos.GetY(), m_pos.GetX(), m_pos.GetY() + 15);
        break;
    case LEFT:
        line(m_pos.GetX(), m_pos.GetY(), m_pos.GetX() - 15, m_pos.GetY());
        break;
    case RIGHT:
        line(m_pos.GetX(), m_pos.GetY(), m_pos.GetX() + 15, m_pos.GetY());
        break;
    default:
        break;
    }

    setcolor(color_save);
    setfillcolor(fill_color_save);
}

void EnemyTank::Move()
{
    switch (m_dir)
    {
    case UP:
        m_pos.SetY(m_pos.GetY() - m_step);
        if (m_pos.GetY() < Graphic::GetBattleGround().GetStartPoint().GetY())
            m_pos.SetY(Graphic::GetBattleGround().GetEndPoint().GetY() - 1);
        break;
    case DOWN:
        m_pos.SetY(m_pos.GetY() + m_step);
        if (m_pos.GetY() > Graphic::GetBattleGround().GetEndPoint().GetY())
            m_pos.SetY(Graphic::GetBattleGround().GetStartPoint().GetY() + 1);
        break;
    case LEFT:
        m_pos.SetX(m_pos.GetX() - m_step);
        if (m_pos.GetX() < Graphic::GetBattleGround().GetStartPoint().GetX())
            m_pos.SetX(Graphic::GetBattleGround().GetEndPoint().GetX() - 1);
        break;
    case RIGHT:
        m_pos.SetX(m_pos.GetX() + m_step);
        if (m_pos.GetX() > Graphic::GetBattleGround().GetEndPoint().GetX())
            m_pos.SetX(Graphic::GetBattleGround().GetStartPoint().GetX() + 1);
        break;
    default:
        break;
    }

    CalculateSphere();
}

void EnemyTank::CalculateSphere()
{
    switch (m_dir)
    {
    case UP:
    case DOWN:
        m_rectSphere.Set(m_pos.GetX() - 13, m_pos.GetY() - 10, m_pos.GetX() + 13, m_pos.GetY() + 10);
        break;
    case LEFT:
    case RIGHT:
        m_rectSphere.Set(m_pos.GetX() - 10, m_pos.GetY() - 13, m_pos.GetX() + 10, m_pos.GetY() + 13);
        break;
    default:
        break;
    }
}
这个文件实在没什么可讲的,基本都用的之前提到的方法。随机生成坦克用到了星空中随机产生星星的方法,相信大家都能看懂。
main.cpp
最后是main函数,代码如下:
#define MAX_TANKS 10

void main()
{
    srand((unsigned)time(NULL));

    Graphic::Create();

    MainTank mainTank;

    Tank* pTank[MAX_TANKS];

    for (int i = 0; i < MAX_TANKS; i++)
    {
        pTank[i] = new EnemyTank();
    }

    bool loop = true;
    bool skip = false;
    while (loop)
    {
        if (kbhit())
        {
            int key = getch();

            switch (key)
            {
            // Up
            case 72:
                mainTank.SetDir(Dir::UP);
                break;
            // Down
            case 80:
                mainTank.SetDir(Dir::DOWN);
                break;
            // Left
            case 75:
                mainTank.SetDir(Dir::LEFT);
                break;
            // Right
            case 77:
                mainTank.SetDir(Dir::RIGHT);
                break;
            case 224: // 方向键高8位
                break;
            // Esc
            case 27:
                loop = false;
                break;
            // Space
            case 32:
                break;
            // Enter
            case 13:
                if (skip)
                    skip = false;
                else
                    skip = true;
                break;
            default:
                break;
            }
        }

        if (!skip)
        {
            cleardevice();

            Graphic::DrawBattleGround();

            mainTank.Move();
            mainTank.Display();

            for (int i = 0; i < MAX_TANKS; i++)
            {
                pTank[i]->Move();
                pTank[i]->Display();
            }
        }

        Sleep(200);
    }

    for (int i = 0; i < MAX_TANKS; i++)
    {
        delete pTank[i];
    }

    Graphic::Destroy();
}
与之前相比,添加了下面这几个内容:
- 新建了一个宏MAX_TANKS用来设置坦克的数量
- 用一个指针数组保存每个坦克的指针
- 循环创建坦克,这里用了new的方法把坦克对象创建在堆空间中
- 每次擦屏之后,遍历指针数组,绘制出每个坦克。调用的是Move()和Display()方法。
- 退出程序前,释放每一个坦克所占的堆空间。
注意:C++中依然是new和delete成对出现,有申请就要有释放。否则会出现内存泄露。
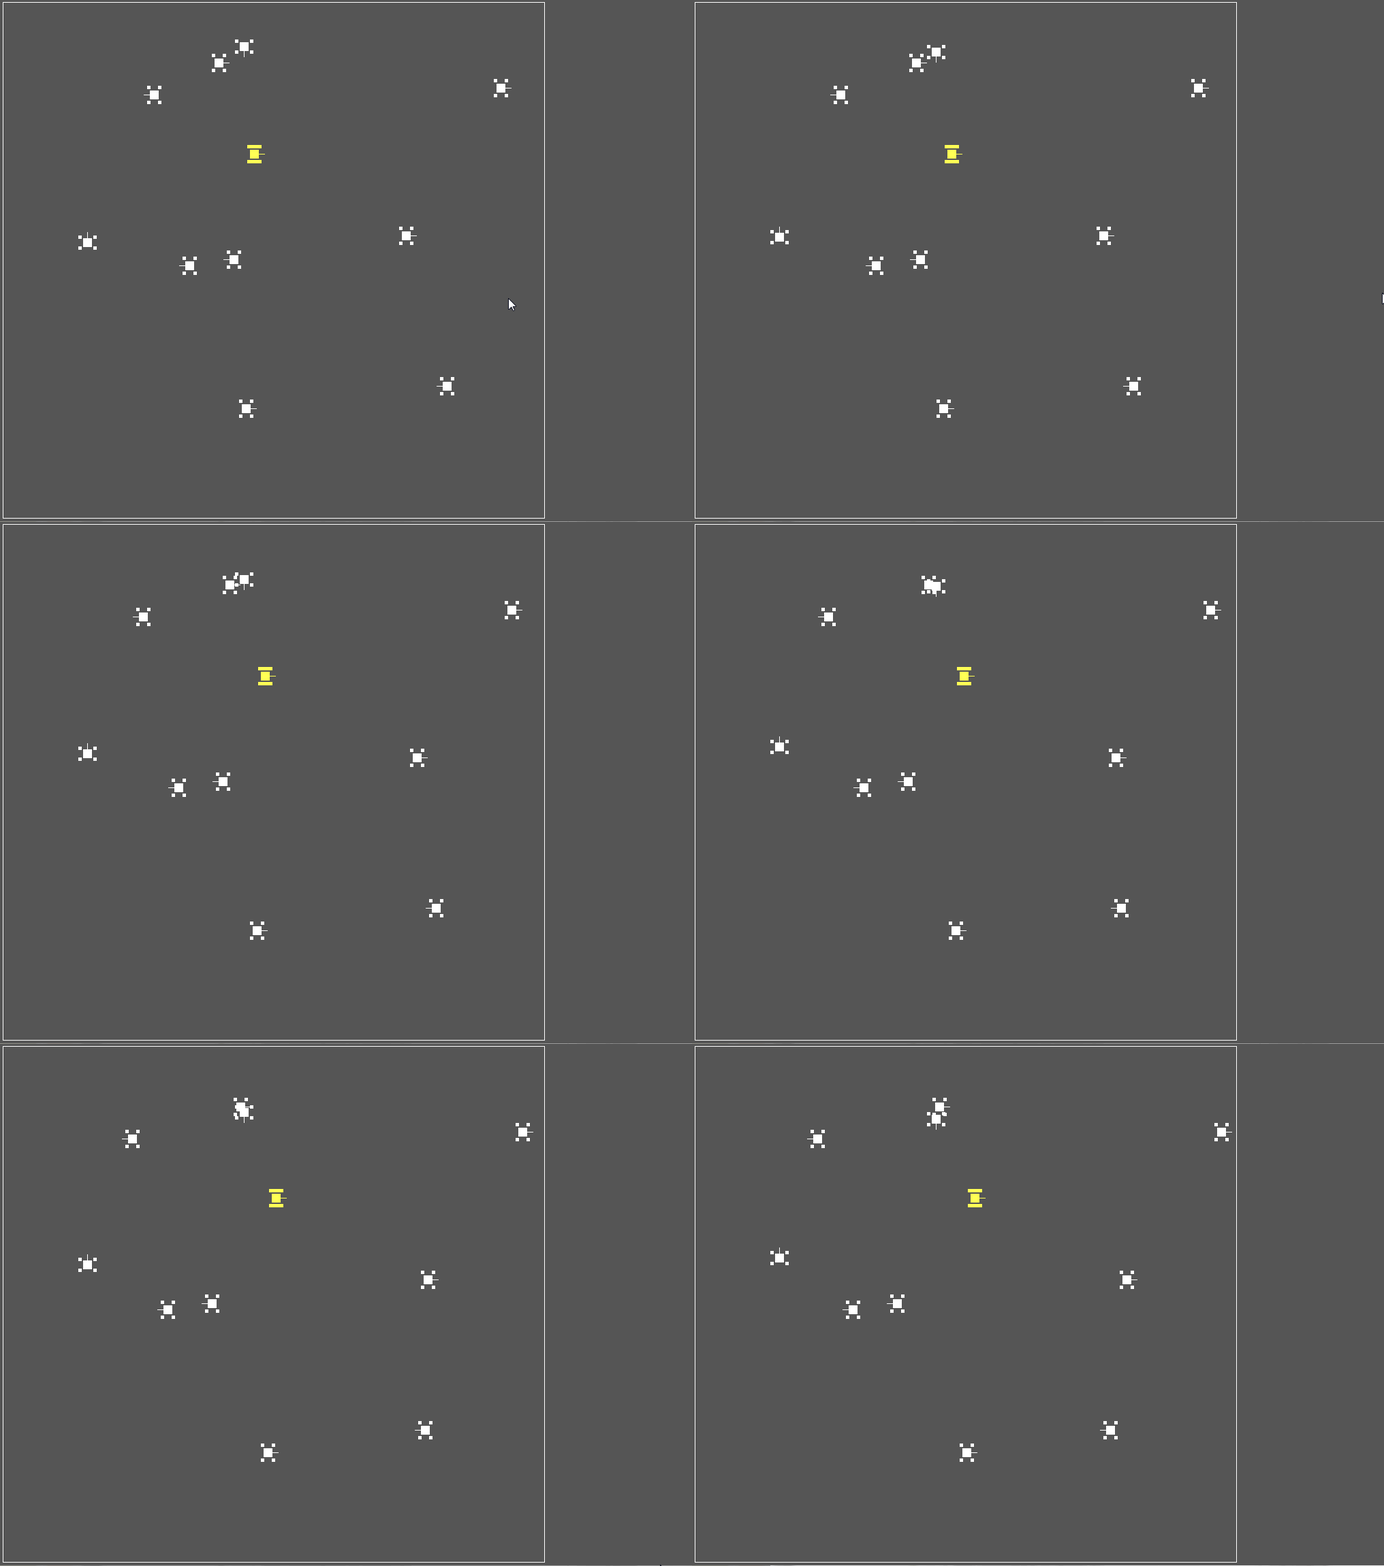
下面运行一下代码,看看我们今天的成果。

是不是一下热闹了很多呢?
这一篇就到这里,源码请到GitHub上下载。
我是天花板,让我们一起在软件开发中自我迭代。
如有任何问题,欢迎与我联系。
上一篇:C++代码训练营 | 坦克大战(1)
下一篇:C++代码训练营 | 坦克大战(3)


网友评论
m_startPoint = m_endPoint;
m_endPoint = m_startPoint;
以上,文件Rect.cpp的check函数值交换有误