小码哥HTML5培训—文章持续更新中......
实现首页中间的内容栏
今天实现首页中间的内容栏,原效果如下:

红框就是今天需要实现的内容
这里可以拆解成四个部分,每个部分都是由相同组件,填充不同内容来实现。
简单布局的实现
在homebean首页json数据中,设置了一个itemBeans的集合数据,存放着我们需要实现的四个部分组件的数据。

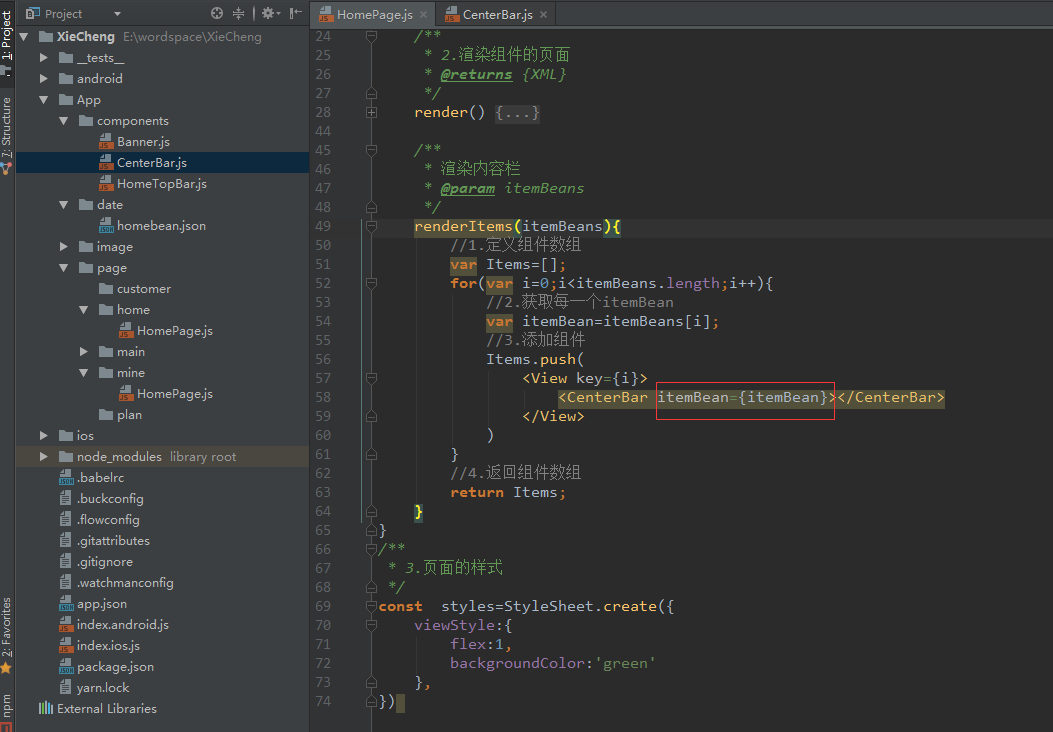
在homepage中遍历itemBeans这个集合数据,并简单的创建四个View组件,预先占位,后面再逐一实现。

定义一个CenterBar组件
创建CenterBar的组件,这个组件就是四个部分的组件了。

使用CenterBar这个组件
在homepage中使用CenterBar这个组件替换掉遍历创建的View组件

传数据到CenterBar组件中
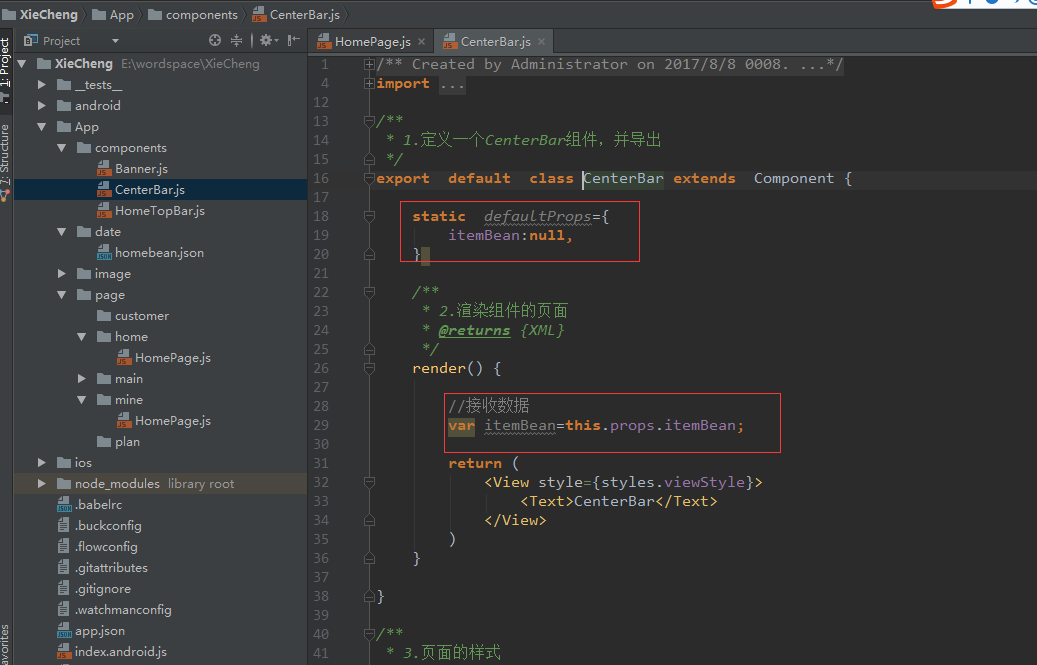
1.传递数据到CenterBar中
CenterBar设置一个属性了itemBean来接收itemBeans数据中对应item对象内容。
2.CenterBar接收数据
在CenterBar通过this.props.itemBean来获取接受到的itemBean数据
//接收数据
var itemBean=this.props.itemBean;
实现CenterBar布局
1.布局的搭建
接收完数据,开始CenterBar布局搭建,这里拆分下结构,如图:
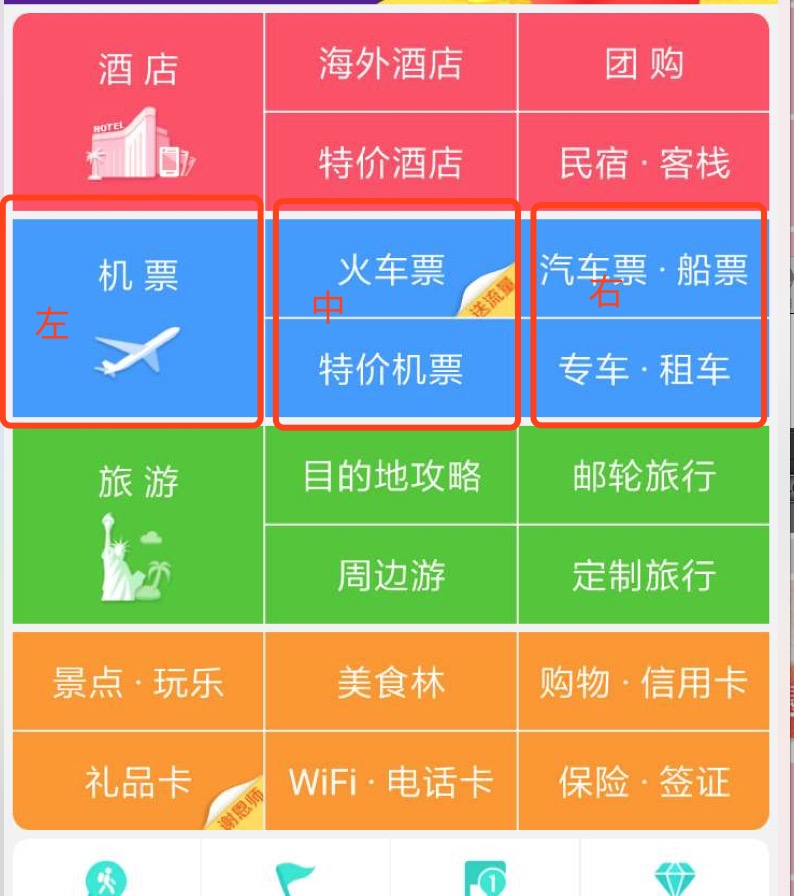
分为左中右结构,中间和右边部分又分为上下结构。

设置属性flexDirection为横向布局row,给左中右三部分设置对应的样式,设置flex属性(类似权重属性),宽度比例为1:1:1。

2.完善中间和右边布局
给每一项填充对应数据。
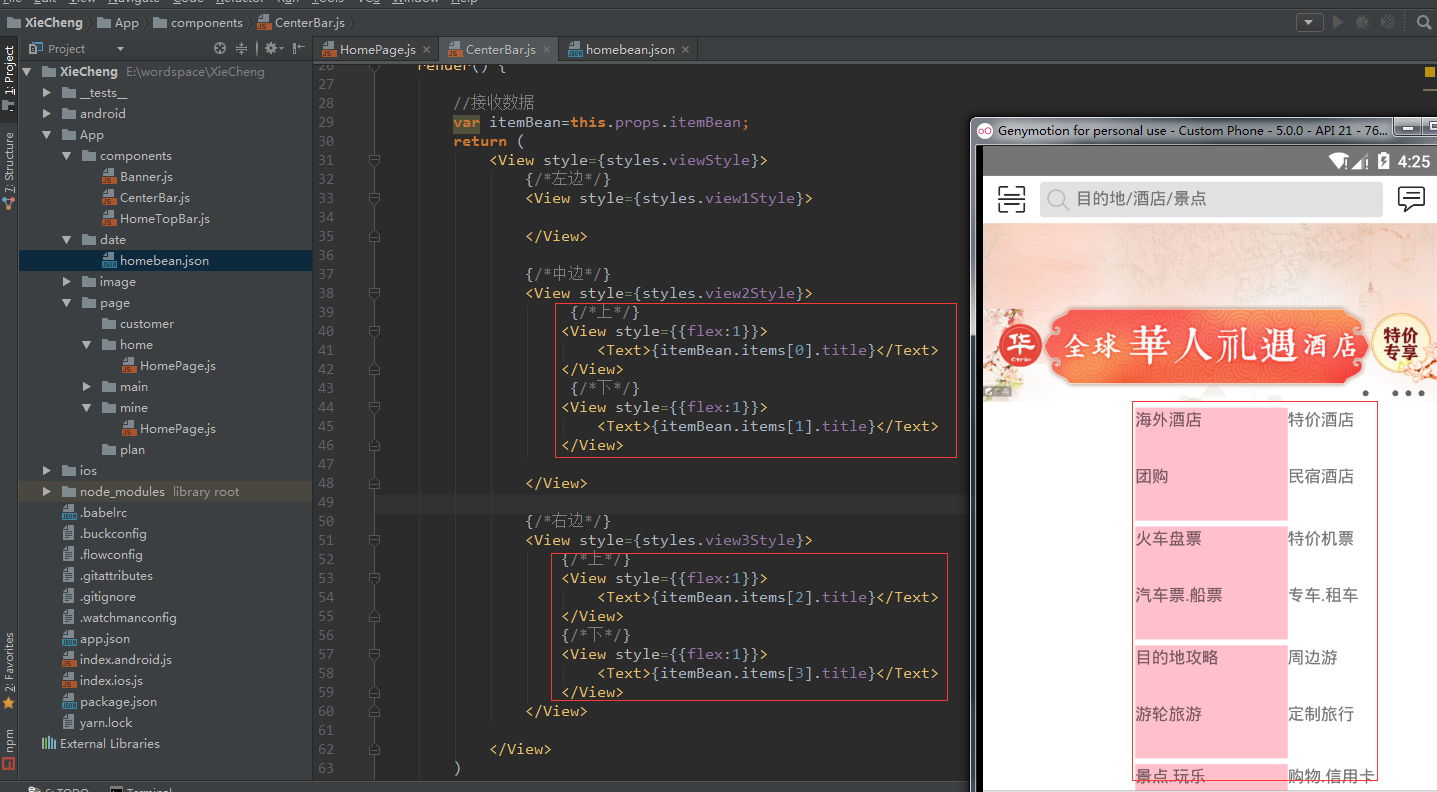
因为中间和右边代码一致,抽取重复的代码,只需传入对应的index值,获取对应数据即可。

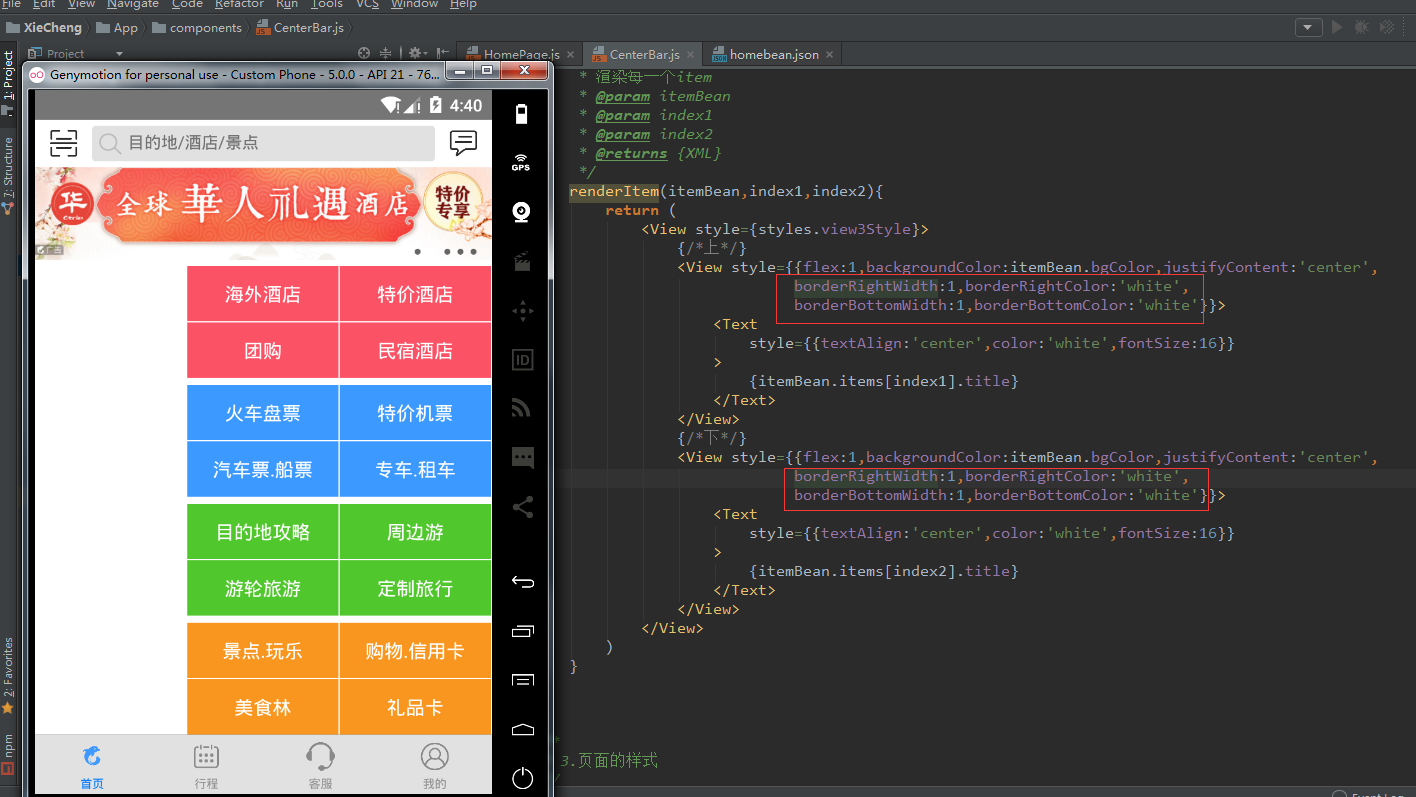
3.完善中、右布局对应的样式
- 给每一项添加背景,这里通过itemBean数据中有个bgColor的值,给不同item设置不同背景颜色
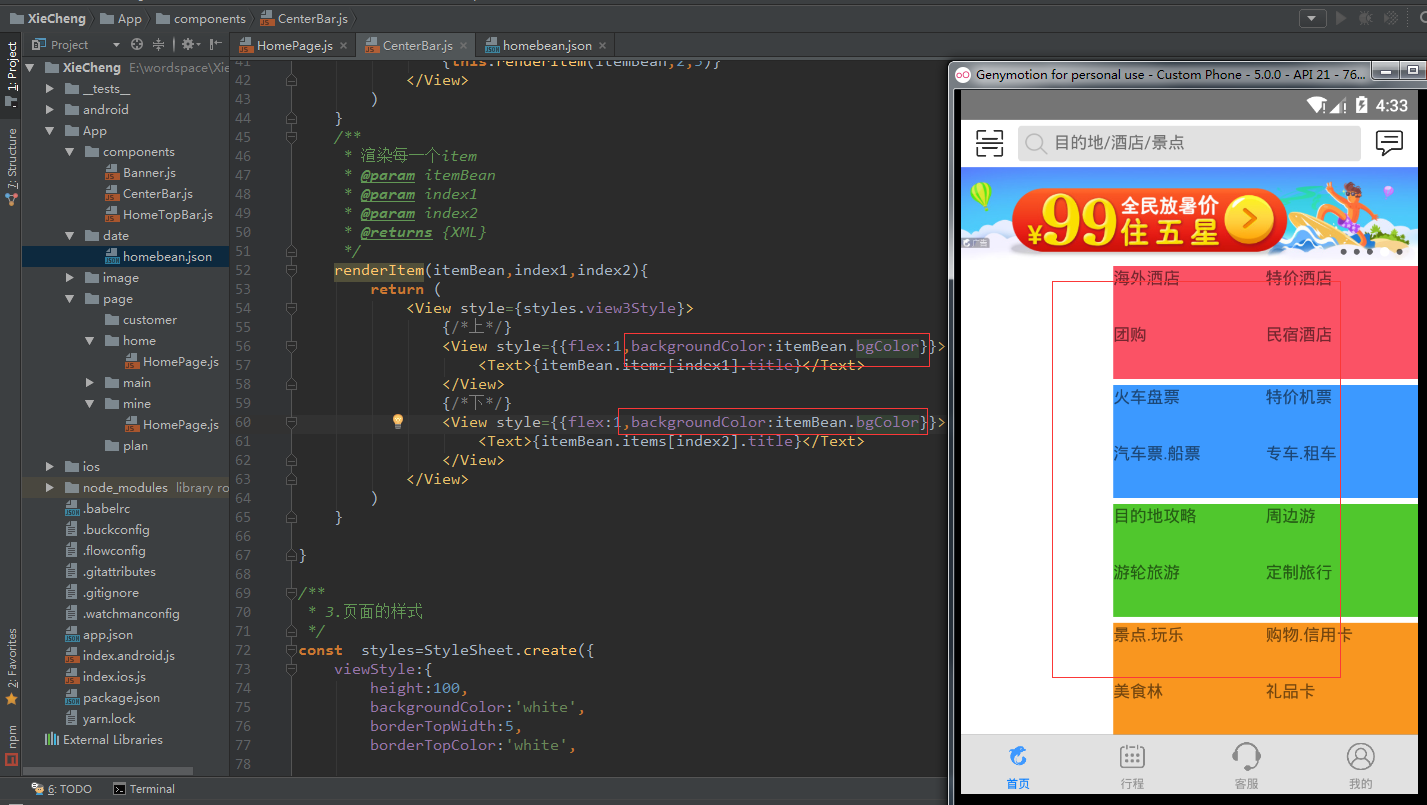
- 设置字体居中和大小

- 添加白色边框
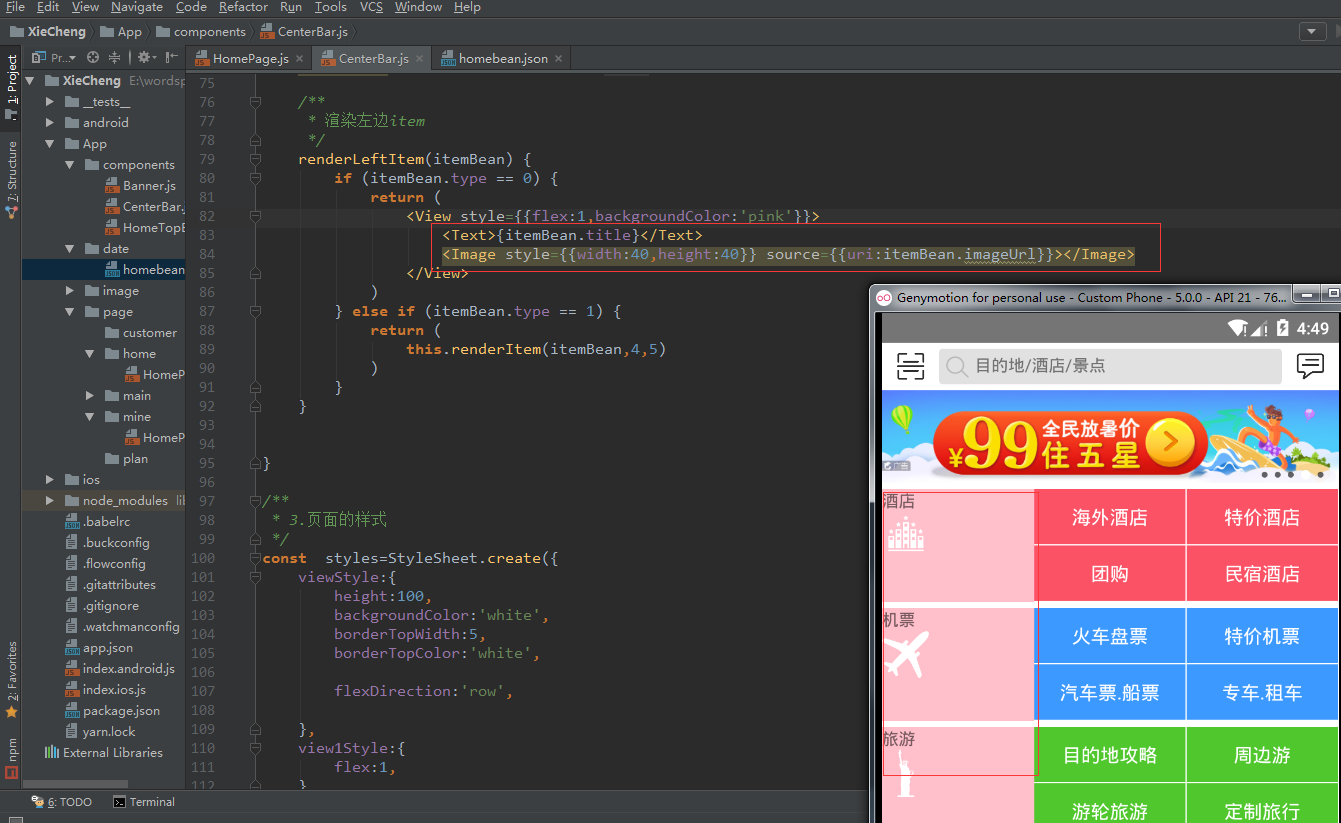
4.完善左边内容
在itembean数据有个type的值用来区分两种类型的item,用来区分item左边部分不同的布局。

- 添加左边的布局结构

- 完善左边的布局
- 修改布局样式

- 修改图片和文字样式
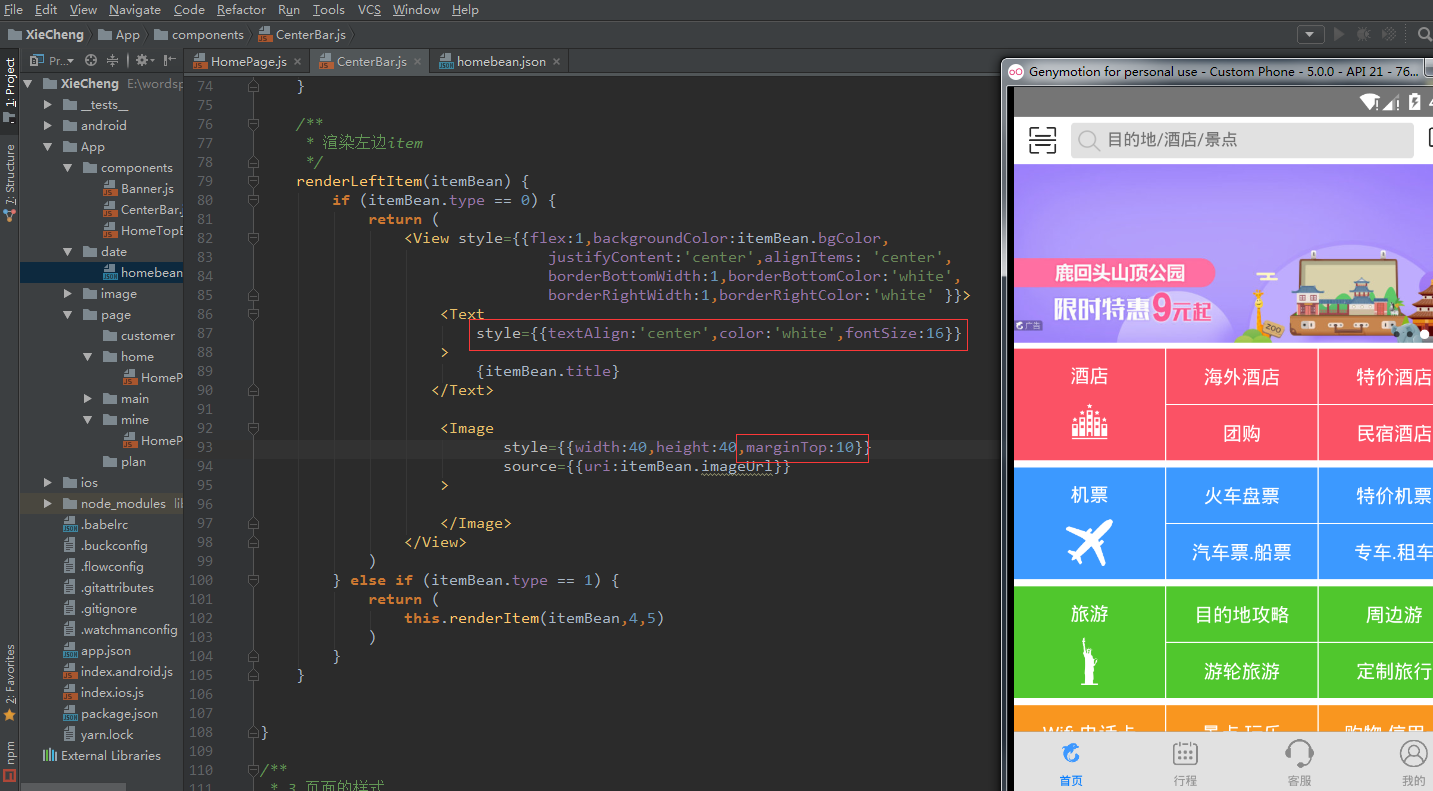
最终效果如下:

最后附上项目地址


网友评论