建立博客有三个阶段
第一阶段,刚接触Blog,觉得很新鲜,试着选择一个免费空间来写。
第二阶段,发现免费空间限制太多,就自己购买域名和空间,搭建独立博客。
第三阶段,觉得独立博客的管理太麻烦,最好在保留控制权的前提下,让别人来管,自己只负责写文章。
没想到自己也走到第三阶段ε٩(๑> ₃ <)۶з...
现在把自己使用Hexo + GitHub搭建博客过程分享一下.
首先安装:
node.js
Git
这个网上都有安装教程
新建一个项目
githubname.github.io
配置ssh keys
打开git bash
 git bash
生成密匙
$ ssh-keygen -t rsa -C "邮件地址@youremail.com"
Generating public/private rsa key pair.
Enter file in which to save the key (/Users/your_user_directory/.ssh/id_rsa):<回车就好>
看到这个样子就说明生成好了,位置在上面路径里面!
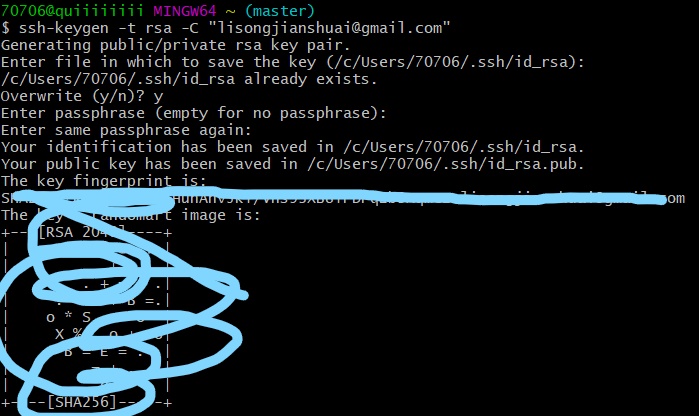 密匙生成图
密匙生成图
ps:输入密码是不会显示的,别输错
把ssh key添加到GitHub
复制你刚刚的密匙文件(使用记事本打开)
 pub 文件
打开你的个人设置(在右上角)
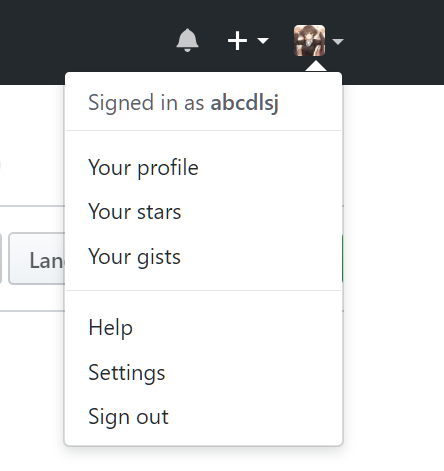 github 设置位置
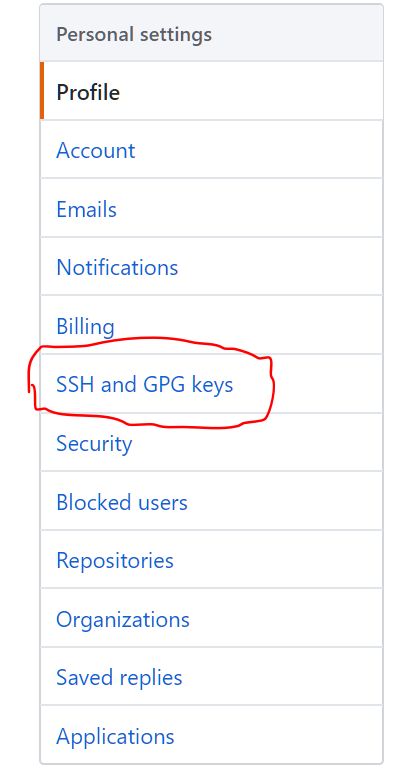 github ssh 位置
最好输入一个title,防止后面有问题
那个文件的后缀是.pub
检查
打开git bash
$ ssh -T git@github.com
如果得到以下反馈
The authenticity of host 'GitHub.com (207.97.227.239)' can't be established.
RSA key fingerprint is 16:27:ac:a5:76:28:2d:36:63:1b:56:4d:eb:df:a6:48.
Are you sure you want to continue connecting (yes/no)
输入yes回车
Enter passphrase for key '/Users/your_user_directory/.ssh/id_rsa':
输入刚才设置的密码回车
 正确显示
正确显示
设置用户信息
现在已经可以通过 SSH 链接到 GitHub 啦!当然还需要完善一些个人信息:
git config --global user.name "Your Name"
git config --global user.email "email@example.com"
开始搭建博客
开始安装,打开 cmd 或者 Git bash 输入
npm install hexo-cli -g
生成博客目录
hexo init blog
cd blog
npm install
生成静态页面
hexo clean
hexo g
运行
hexo s
然后打开浏览器,输入地址 localhost:4000 即可看到效果
这时候我们可以ctrl+c关闭进行下一步
部署到 Github
安装 hexo-deployer-git
npm install hexo-deployer-git --save
网站配置git
在网站的_config.yml中配置deploy
deploy:
type: git
repo: git@github.com:abcdlsj/abcdlsj.github.io.git
branch: master
详细参考官方文档Hexo
部署
hexo d
使用自己的域名
域名解析
打开cmd
ping githubname.github.io
然后复制地址
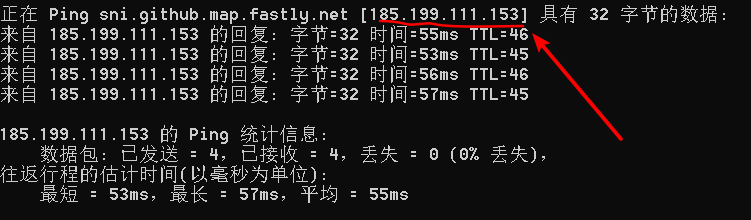 ping abcdlsj.github.io
在你的解析面板中添加这样几条
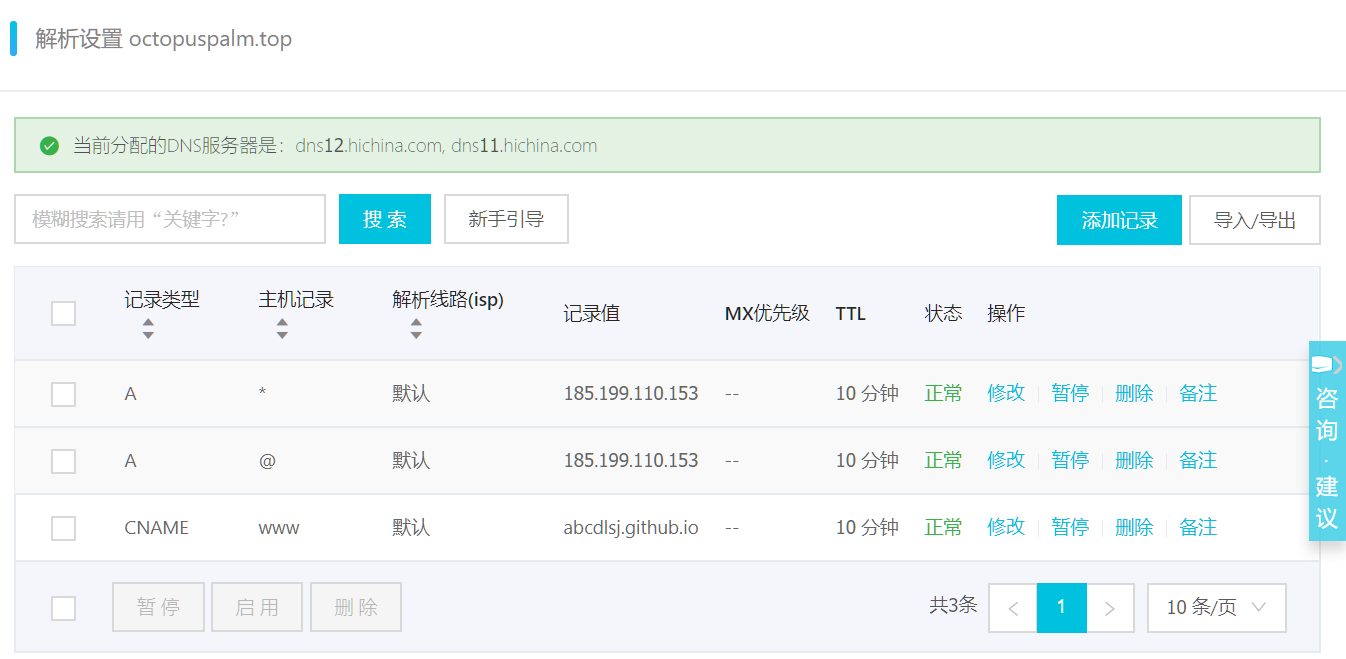 解析样例
解析样例
打开你的博客目录source文件夹
新建一个文本文档CNAME里面输入你的域名(不要带www)
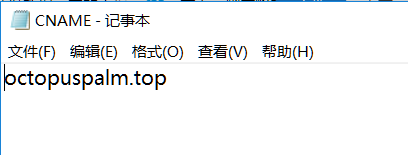 CNAME演示
这里有一个坑,记得要把文档后缀txt去掉


网友评论