DeepLearning4j-使用Java训练YOLO模型
在这个Yolo v3发布的大好日子。
Deeplearning4j终于迎来了新的版本更新1.0.0-alpha,在zoo model中引入TinyYolo模型可以训练自己的数据用于目标检测。
不得不说,在Yolo v3这种性能和准确率上面都有大幅度提升的情况下,dl4j才引入TinyYolo总有一种49年加入国军的感觉
一、任务和数据
数据来源自 https://github.com/cosmicad/dataset ,主要目的是识别并定位图像中的红细胞。
数据集总共分为两个部分:
- 数据集:JPEGImages
- 标签:Annotations
1.1 数据集
数据集样张如图所示:
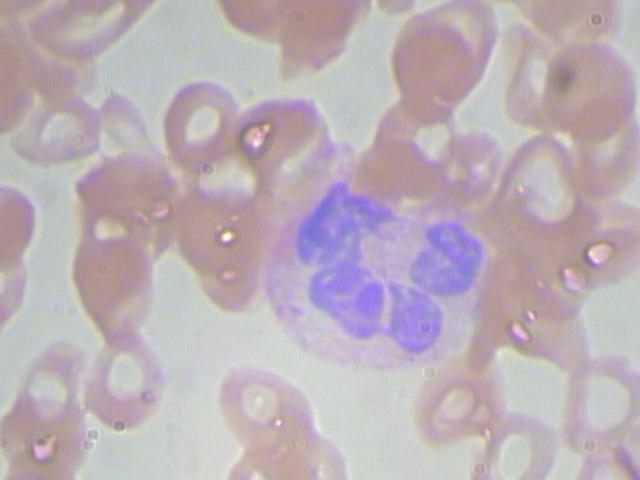 数据集
数据集
数据集中所有的图像均为.jpg格式。一共有410张图片用于模型的训练。
1.2 标签
标签如图所示,每一个图片都会有一个对应的xml文件作为训练标签。
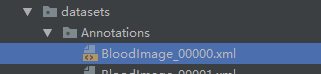 标签
标签
没一个标签的数据都是遵守PASCAL VOC的数据格式,文件内容如下:
<annotation verified="no">
  <folder>RBC</folder>
  <filename>BloodImage_00000</filename>   //对应的图片
  <path>/Users/cosmic/WBC_CLASSIFICATION_ANNO/RBC/BloodImage_00000.jpg</path>  //路径(不重要)
  <source>                               //数据来源(不重要)
    <database>Unknown</database>
  </source>
  <size>                                 //图像的宽高和通道数
    <width>640</width>
    <height>480</height>
    <depth>3</depth>
  </size>
  <segmented>0</segmented>               //是否用于分割(在图像物体识别中01无所谓)
  <object>                               //需要检测的物体
    <name>RBC</name>                     //物体类别的标签,可以使用中文
    <pose>Unspecified</pose>             //拍摄角度
    <truncated>0</truncated>             //是否被截断(0表示完整)
    <difficult>0</difficult>             //目标是否难以识别(0表示容易识别)
    <bndbox>                             //bounding-box(包含左上角和右下角xy坐标)
      <xmin>216</xmin>
      <ymin>359</ymin>
      <xmax>316</xmax>
      <ymax>464</ymax>
    </bndbox>
  </object>

  ...                                    //如果需要检测多个物体,则定义多个<object></object>对象即可
</annotation>
1.3 如何制作自己的数据集
- labelImg: https://blog.csdn.net/jesse_mx/article/details/53606897
- BBox-Label-Tool: https://github.com/puzzledqs/BBox-Label-Tool
二、模型训练
2.1 预定义参数用于模型的训练
// parameters matching the pretrained TinyYOLO model
int width = 416;
int height = 416;
int nChannels = 3;
int gridWidth = 13;
int gridHeight = 13;
以上代码定义的是:
- 宽高和图像的通道数
- YOLO模型对图像分割的尺寸,在这里被分割成为
13 x 13
// number classes for the red blood cells (RBC)
int nClasses = 1;
定义我们需要分类的数量,在这里我们只识别红细胞这一个物体,因为值为1。
// parameters for the Yolo2OutputLayer
int nBoxes = 5;
double lambdaNoObj = 0.5;
double lambdaCoord = 5.0;
double[][] priorBoxes = { { 2, 2 }, { 2, 2 }, { 2, 2 }, { 2, 2 }, { 2, 2 } };
double detectionThreshold = 0.3;
定义我们模型输出层的一些参数。
// parameters for the training phase
int batchSize = 2;
int nEpochs = 50;
double learningRate = 1e-3;
double lrMomentum = 0.9;
定义一些我们训练时模型的参数:
- batchSize为2,这里主要是因为我使用CPU运行,而且电脑只有8G运存,因此当你电脑配置更高的时候可以选择更大的值使得模型获得更好的训练结果。
- nEpoch为50,总共训练数据50个轮次。
- learningRate,学习率为
1e-3。 - 学习率衰减动量,应用于
Nesterovs更新器。
2.2 数据读取
String dataDir = new ClassPathResource("/datasets").getFile().getPath();
File imageDir = new File(dataDir, "JPEGImages");
在本项目中数据被存放在resources文件夹下,因此需要获取类路径,这里主要是获取图像目录。
log.info("Load data...");

RandomPathFilter pathFilter = new RandomPathFilter(rng) {
    @Override
    protected boolean accept(String name) {
        name = name.replace("/JPEGImages/", "/Annotations/").replace(".jpg", ".xml");
        try {
            return new File(new URI(name)).exists();
        } catch (URISyntaxException ex) {
            throw new RuntimeException(ex);
        }
    }
};
InputSplit[] data = new FileSplit(imageDir, NativeImageLoader.ALLOWED_FORMATS, rng).sample(pathFilter, 0.8, 0.2);
InputSplit trainData = data[0];
InputSplit testData = data[1];
读取训练数据,并且将数据划分为训练集和测试集。
ObjectDetectionRecordReader recordReaderTrain = new ObjectDetectionRecordReader(height, width, nChannels, gridHeight, gridWidth, new VocLabelProvider(dataDir));

recordReaderTrain.initialize(trainData);

ObjectDetectionRecordReader recordReaderTest = new ObjectDetectionRecordReader(height, width, nChannels, gridHeight, gridWidth,
    new VocLabelProvider(dataDir));
recordReaderTest.initialize(testData);

// ObjectDetectionRecordReader performs regression, so we need to specify it here
RecordReaderDataSetIterator train = new RecordReaderDataSetIterator(recordReaderTrain, batchSize, 1, 1, true);
train.setPreProcessor(new ImagePreProcessingScaler(0, 1));

RecordReaderDataSetIterator test = new RecordReaderDataSetIterator(recordReaderTest, 1, 1, 1, true);
test.setPreProcessor(new ImagePreProcessingScaler(0, 1));
构建训练集和测试集的迭代器,并且创建数据预处理器,使得图像数据在训练时被缩放至0~1范围内。
2.3 模型构建
ComputationGraph model;
String modelFilename = "model_rbc.zip";
ComputationGraph pretrained = (ComputationGraph) new TinyYOLO().initPretrained();
INDArray priors = Nd4j.create(priorBoxes);
首先会从网络上面下载预训练模型,下载地址为用户目录下的.deeplearning4j目录下,内容如图所示:
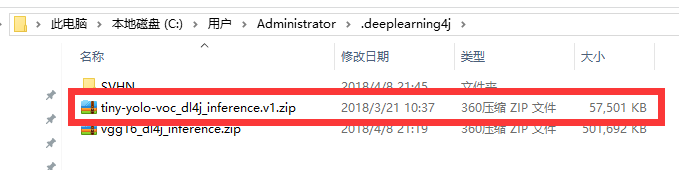 预训练模型
预训练模型
接下来使用fine tune对模型结构进行更改:
 FineTuneConfiguration fineTuneConf = new FineTuneConfiguration.Builder().seed(seed)
                .optimizationAlgo(OptimizationAlgorithm.STOCHASTIC_GRADIENT_DESCENT).gradientNormalization(GradientNormalization.RenormalizeL2PerLayer)
                .gradientNormalizationThreshold(1.0).updater(new Adam.Builder().learningRate(learningRate).build())
                .updater(new Nesterovs.Builder().learningRate(learningRate).momentum(lrMomentum).build()).activation(Activation.IDENTITY)
                .trainingWorkspaceMode(WorkspaceMode.SEPARATE).inferenceWorkspaceMode(WorkspaceMode.SEPARATE).build();
以上代码主要做了这几件事情:
- 使用随机梯度下降优化算法
- 使用
RenormalizeL2PerLayer梯度标准化算法,用于防止梯度消失和梯度爆炸,具体内容可看:https://blog.csdn.net/u011669700/article/details/78974518 - 使用
Nesterovs更新器,配置学习率和动量 - 设定训练模式,具体可看:https://blog.csdn.net/u011669700/article/details/78846452
之后使用迁移学习对于模型架构记性修改:
model = new TransferLearning.GraphBuilder(pretrained).fineTuneConfiguration(fineTuneConf).removeVertexKeepConnections("conv2d_9")
                .addLayer("convolution2d_9",
                    new ConvolutionLayer.Builder(1, 1).nIn(1024).nOut(nBoxes * (5 + nClasses)).stride(1, 1).convolutionMode(ConvolutionMode.Same)
                        .weightInit(WeightInit.UNIFORM).hasBias(false).activation(Activation.IDENTITY).build(),
                    "leaky_re_lu_8")
                .addLayer("outputs", new Yolo2OutputLayer.Builder().lambbaNoObj(lambdaNoObj).lambdaCoord(lambdaCoord).boundingBoxPriors(priors).build(),
                    "convolution2d_9")
                .setOutputs("outputs")
                .build();
主要是配置识别的种类数目。
2.4 模型训练
model.setListeners(new ScoreIterationListener(1));
for (int i = 0; i < nEpochs; i++) {
    train.reset();
    while (train.hasNext()) {
        model.fit(train.next());
    }
    log.info("*** Completed epoch {} ***", i);
}
ModelSerializer.writeModel(model, modelFilename, true);
模型训练完成之后,序列化保存在本地。
2.5 模型检测可视化
// visualize results on the test set
NativeImageLoader imageLoader = new NativeImageLoader();
CanvasFrame frame = new CanvasFrame("RedBloodCellDetection");
OpenCVFrameConverter.ToMat converter = new OpenCVFrameConverter.ToMat();
org.deeplearning4j.nn.layers.objdetect.Yolo2OutputLayer yout = (org.deeplearning4j.nn.layers.objdetect.Yolo2OutputLayer) model.getOutputLayer(0);
List<String> labels = train.getLabels();
test.setCollectMetaData(true);
while (test.hasNext() && frame.isVisible()) {
    org.nd4j.linalg.dataset.DataSet ds = test.next();
    RecordMetaDataImageURI metadata = (RecordMetaDataImageURI) ds.getExampleMetaData().get(0);
    INDArray features = ds.getFeatures();
    INDArray results = model.outputSingle(features);
    List<DetectedObject> objs = yout.getPredictedObjects(results, detectionThreshold);
    File file = new File(metadata.getURI());
    log.info(file.getName() + ": " + objs);

    Mat mat = imageLoader.asMat(features);
    Mat convertedMat = new Mat();
    mat.convertTo(convertedMat, CV_8U, 255, 0);
    int w = metadata.getOrigW() * 2;
    int h = metadata.getOrigH() * 2;
    Mat image = new Mat();
    resize(convertedMat, image, new Size(w, h));
    for (DetectedObject obj : objs) {
        double[] xy1 = obj.getTopLeftXY();
        double[] xy2 = obj.getBottomRightXY();
        String label = labels.get(obj.getPredictedClass());
        int x1 = (int) Math.round(w * xy1[0] / gridWidth);
        int y1 = (int) Math.round(h * xy1[1] / gridHeight);
        int x2 = (int) Math.round(w * xy2[0] / gridWidth);
        int y2 = (int) Math.round(h * xy2[1] / gridHeight);
        rectangle(image, new Point(x1, y1), new Point(x2, y2), Scalar.RED);
        putText(image, label, new Point(x1 + 2, y2 - 2), FONT_HERSHEY_DUPLEX, 1, Scalar.GREEN);
    }
    frame.setTitle(new File(metadata.getURI()).getName() + " - RedBloodCellDetection");
    frame.setCanvasSize(w, h);
    frame.showImage(converter.convert(image));
    frame.waitKey();
}
frame.dispose();
三、实验结果
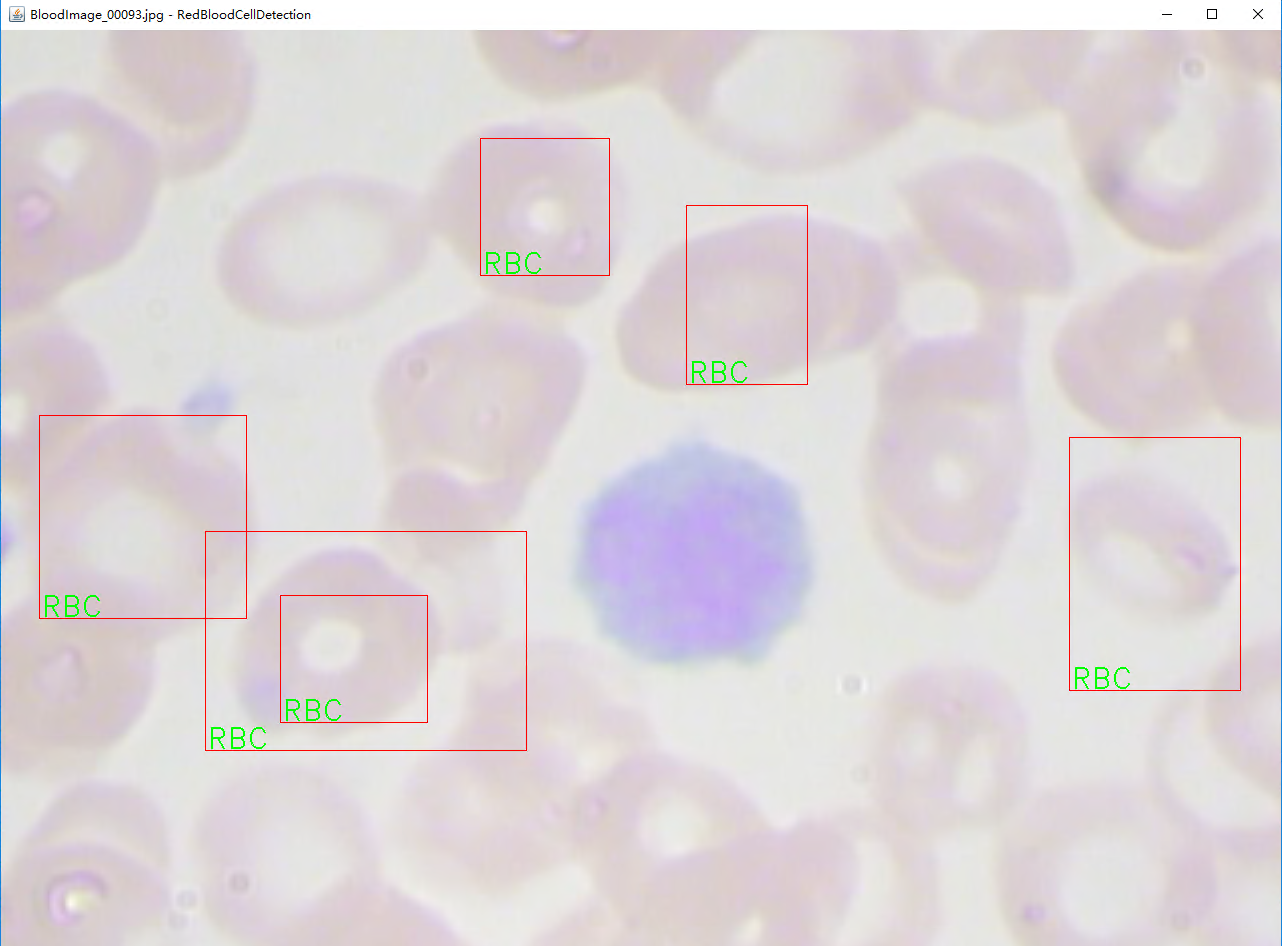 结果展示
结果展示
因为数据量少,训练轮次小导致结果不是很好,有兴趣的可以自己尝试继续训练。
四、代码地址
代码地址已经放在github上面,自行下载即可: https://github.com/sjsdfg/dl4j-tutorials
在包styletransfer下,可以随意运行。
更多文档可以查看 https://github.com/sjsdfg/deeplearning4j-issues。
你的star是我持续分享的动力


网友评论